Kubernetes集群包管理解决方案及应用商店 Helm&Kubeapps
一、引入helm原因
当今的软件开发,随着云原生技术的普及,我们的工程应用进行微服务化和容器化的现象也变得越来越普遍。而Kubernetes几乎已经成了云原生服务编排绕不开的标准和技术。
假设我们需要在K8s中简单部署一个nginx,必要步骤如下:
1、创建或者编写deployment模板
# kubectl create deployment nginx --image=nginx --dry-run=client -o yaml > deployment.yaml
2、启动nginx的pod
# kubectl apply -f deployment.yaml
3、检查pod服务
# kubectl get pod
4、创建service
# kubectl expose deployment nginx --port=8099 --target-port=80 --type=NodePort --dry-run=client -o yaml > service.yaml
5、启动service服务
# kubectl apply -f service.yaml
6、检查service端口
# kubectl get svc
7、访问nginx服务

实际生产中,微服务项目可能有十几个模块,若还需要进行安全访问和控制,那么需要创建诸如Role、ServiceAccount等资源。部署和版本升级时也往往需要修改或添加配置文件中的一些参数(例如:服务占用的CPU、内存、副本数、端口等),维护大量的yaml文件极为不便,所以,我们需要将这些YAML文件作为一个**整体**管理,并高效复用。
- 在Linux操作系统软件部署中,我们可以使用批量管理工具完成软件的批量管理等,例如yum、dnf等;
- 在容器应用中Docker使用Dockerfile文件解决了容器镜像制作难题;
- 在kubernetes应用中,通过YAML格式文件解决容器编排部署难题,例如可以通过YAML格式的资源清单文件,非常方便部署不同控制器类型的应用;但是如何维护大量的,系统性的YAML文件,需要我们拥有更好的工具,不能简单使用YAML资源清单托管服务器就可以解决的,
那么在CNCF的体系中是否存在这样的强力“工具”,能够简化我们部署安装过程呢?答案是存在的,Helm就是这样一款工具。
二、helm是什么
-
官方: https://helm.sh/
-
作为CNCF的毕业项目。它的官方的定义是:Helm是一个为K8s进行包管理的工具。Helm将yaml作为一个整体管理并实现了这些yaml的高效复用,就像Linux中的yum或apt-get,它使我们能够在K8s中方便快捷的安装、管理、卸载K8s应用。
- Helm(舵柄; 舵轮)是一个Kubernetes的包管理工具,就像Linux下的包管理器,如yum/apt等。
- helm一个命令行客户端工具,主要用于Kubernetes应用chart的创建、打包、发布和管理。
- 通过helm可以很方便的将之前打包好的yaml文件部署到kubernetes上。
- 对于应用发布者而言,可以通过Helm打包应用,管理应用依赖关系,管理应用版本并发布应用到软件仓库。
- 对于使用者而言,使用Helm后不用需要了解Kubernetes的Yaml语法并编写应用部署文件,可以通过Helm下载并在kubernetes上安装需要的应用。
- 除此以外,Helm还提供了kubernetes上的软件部署,删除,升级,回滚应用的强大功能。
- Helm 社区已经维护了一个官方 Helm Hub,我们可以直接使用已经做好的 Helm Chart,部署和管理比较复杂的应用程序
- 早期的hub.helm.dev转移到了https://artifacthub.io/。
三、helm作用及核心概念
Helm基于go模板语言,用户只要提供规定的目录结构和模板文件。在真正部署时Helm模板引擎便可以将其渲染成真正的K8s资源配置文件,并按照正确的顺序将它们部署到节点上。
Helm 定义了一套 Chart 格式来描述一个应用。打个比方,一个安卓程序打包成 APK 格式,就可以安装到任意一台运行安卓系统的手机上,如果我们把 kubernetes 集群比做安卓系统,kubernetes 集群内应用比做安卓程序,那么 Chart 就可以比做 APK。这就意味着,kubernetes 集群应用只要打包成 Chart,就可以通过 Helm 部署到任意一个 kubernetes 集群中。
Helm中有三个重要概念,分别为Chart、Repository和Release。
-
Chart代表中Helm包。它包含在K8s集群内部运行应用程序,工具或服务所需的所有资源定义,为所有项目资源清单yaml文件的集合,采用TAR格式,可以类比成yum中的RPM。
-
Repository就是用来存放和共享Chart的地方,可以类比成YUM仓库。
-
Release是运行在K8s集群中的Chart的实例,一个Chart可以在同一个集群中安装多次。Chart就像流水线中初始化好的模板,Release就是这个“模板”所生产出来的各个产品。
Helm作为K8s的包管理软件,每次安装Charts 到K8s集群时,都会创建一个新的 release。你可以在Helm 的Repository中寻找需要的Chart。Helm对于部署过程的优化的点在于简化了原先完成配置文件编写后还需使用一串kubectl命令进行的操作、统一管理了部署时的可配置项以及方便了部署完成后的升级和维护。
三、helm架构
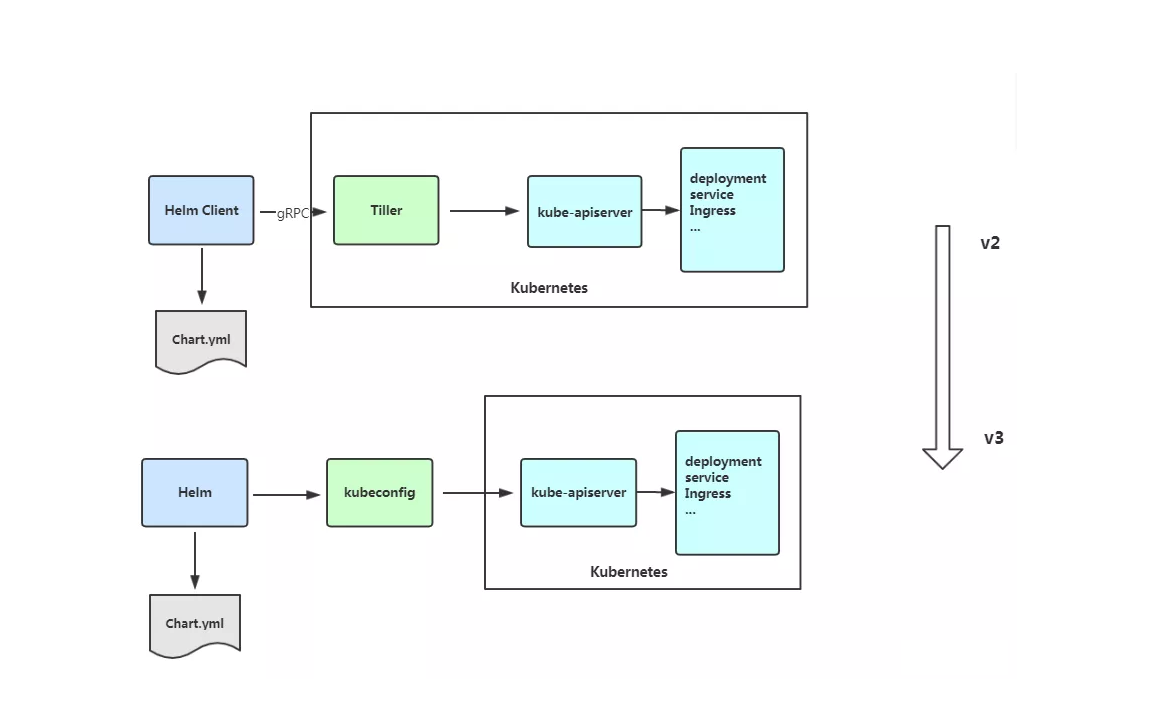
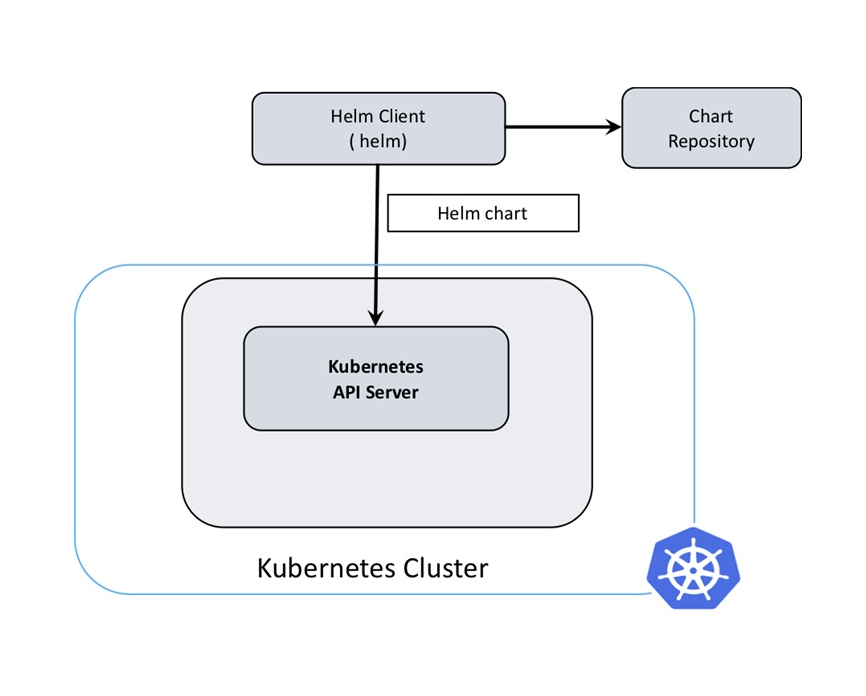
Helm客户端使用REST+JSON的方式与K8s中的apiserver进行交互,进而管理deployment、service等资源,并且客户端本身并不需要数据库,它会把相关的信息储存在K8s集群内的Secrets中。
四、helm部署
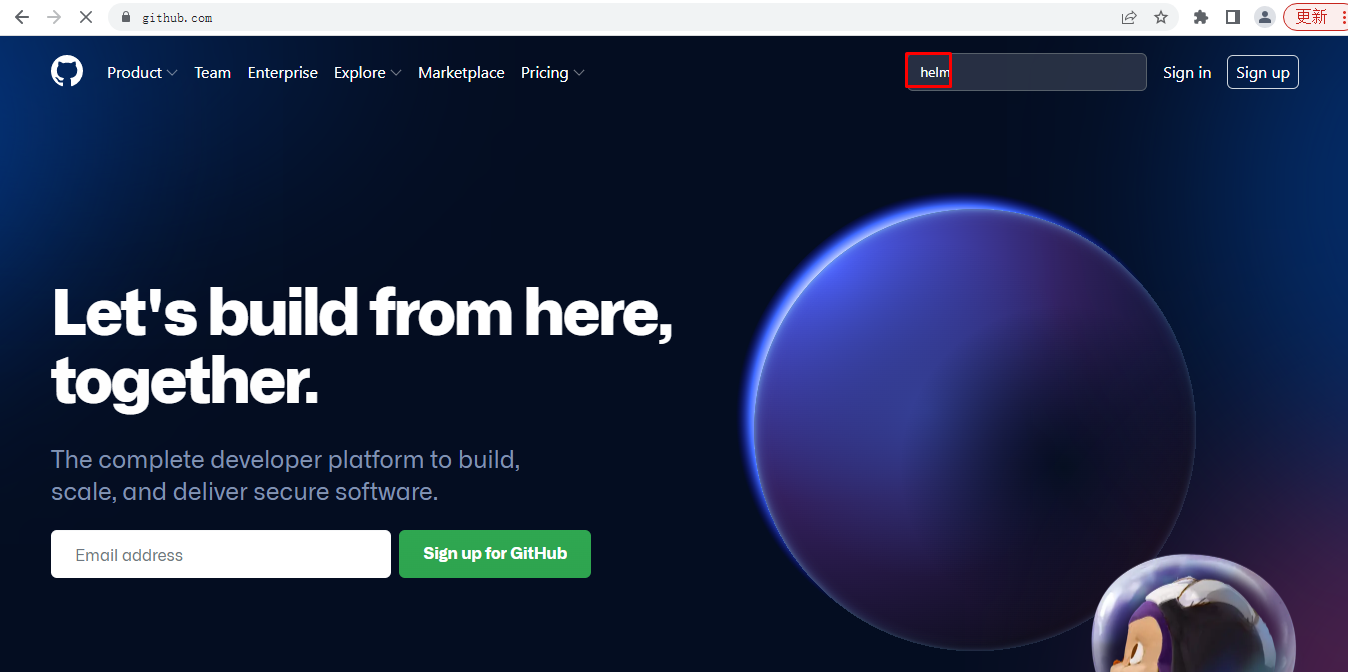
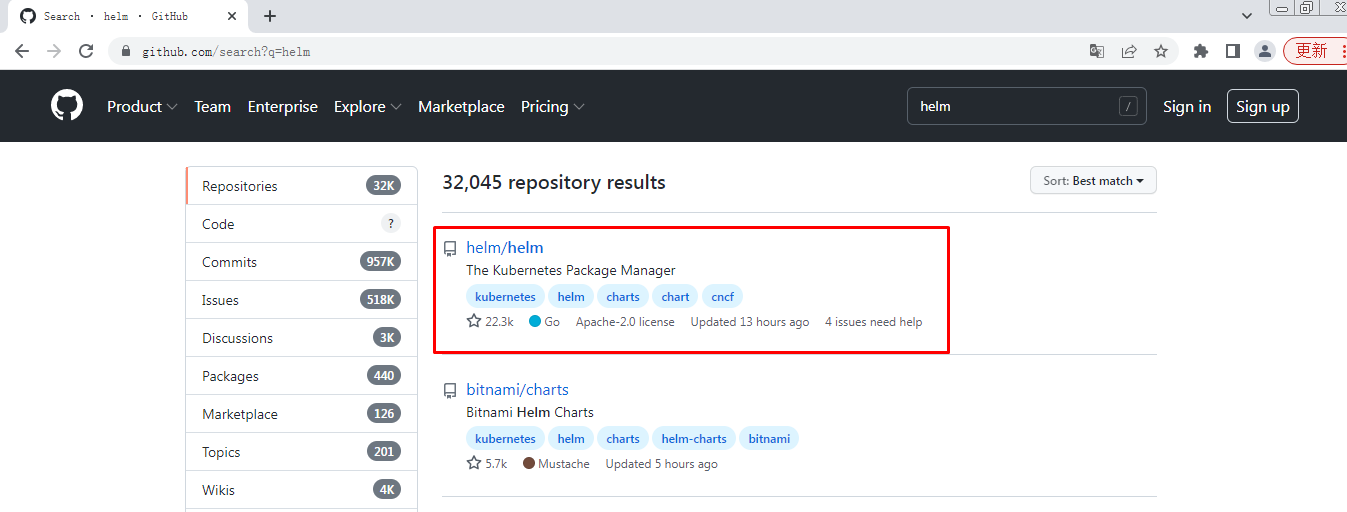
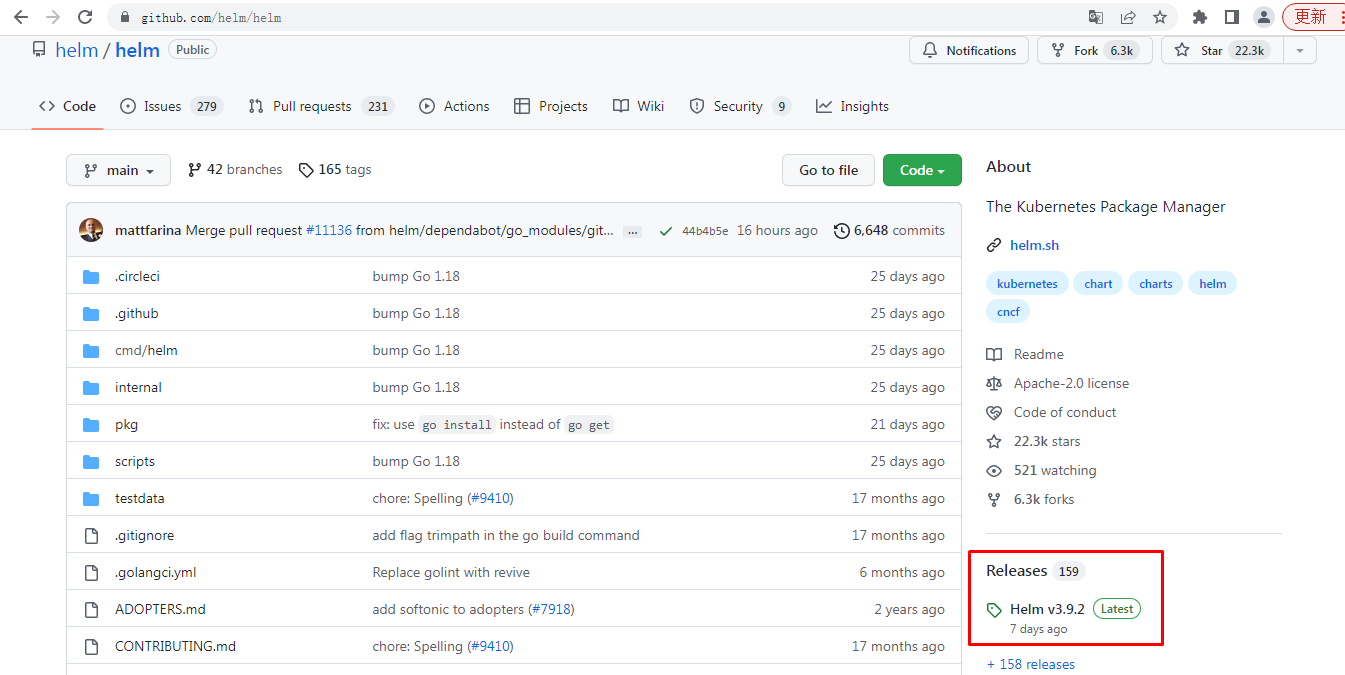
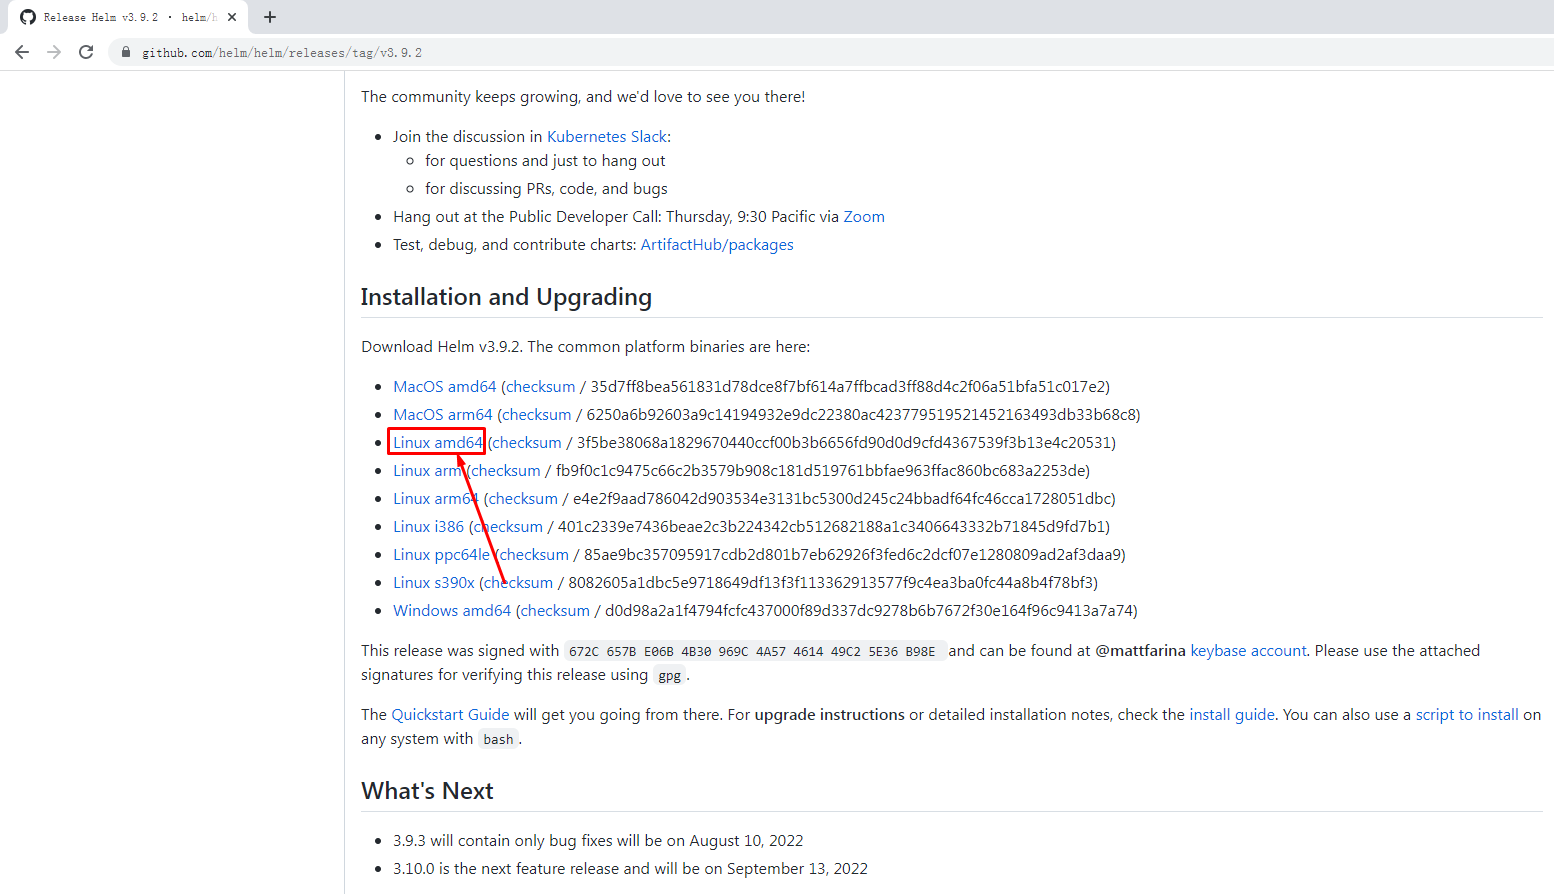
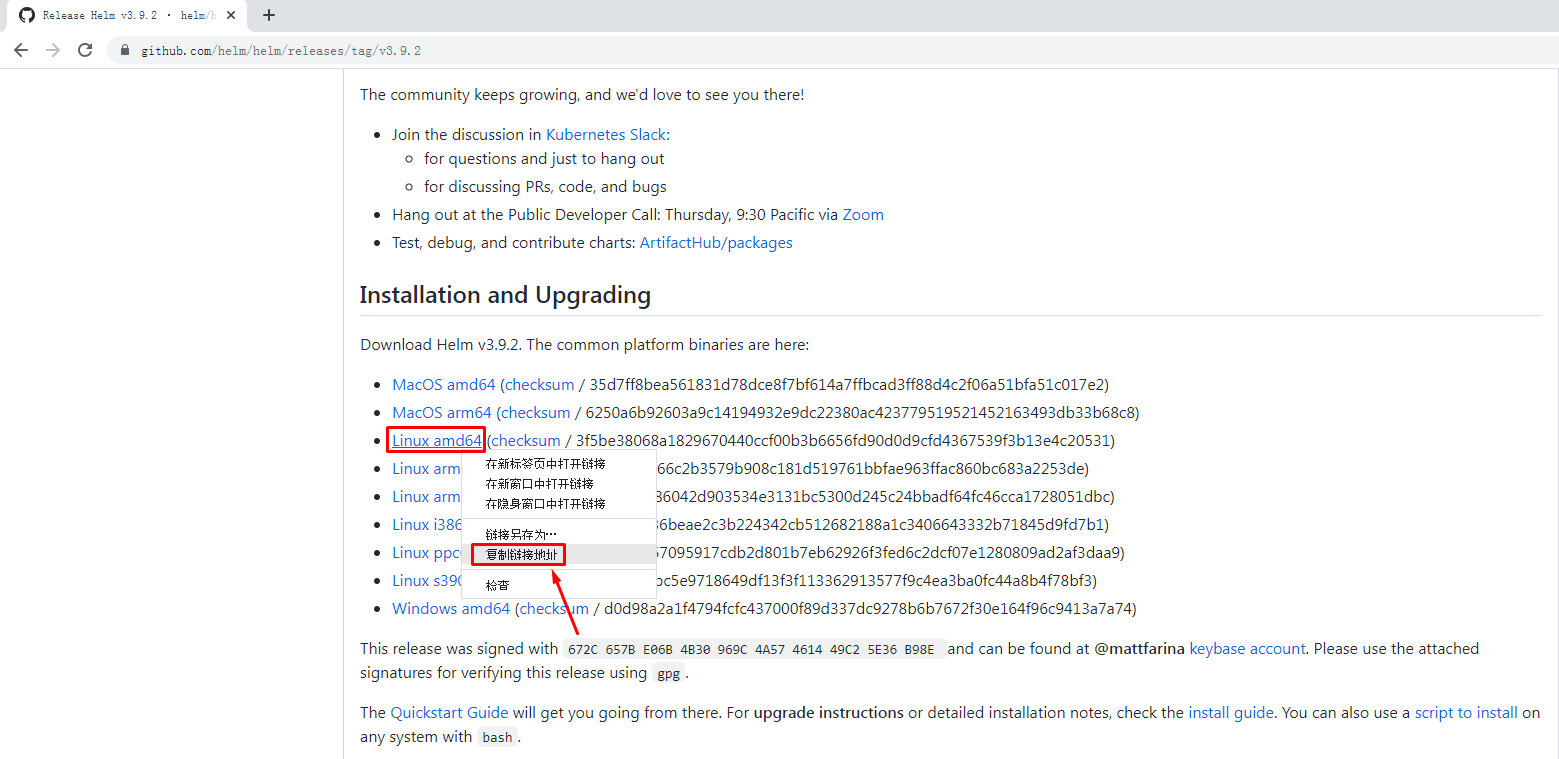
[root@k8s-master01 ~]# wget https://get.helm.sh/helm-v3.9.2-linux-amd64.tar.gz
[root@k8s-master01 ~]#  ls
helm-v3.9.2-linux-amd64.tar.gz
[root@k8s-master01 ~]# tar xf helm-v3.9.2-linux-amd64.tar.gz
[root@k8s-master01 ~]# ls
linux-amd64
[root@k8s-master01 ~]# cd linux-amd64/
[root@k8s-master01 linux-amd64]# ls
helm  LICENSE  README.md
[root@k8s-master01 linux-amd64]# mv helm /usr/bin
[root@k8s-master01 linux-amd64]# helm version
version.BuildInfo{Version:"v3.9.2", GitCommit:"1addefbfe665c350f4daf868a9adc5600cc064fd", GitTreeState:"clean", GoVersion:"go1.17.12"}
五、helm基础使用
5.1 添加及删除仓库
5.1.1 查看仓库
[root@master1 ~]# helm repo list
Error: no repositories to show
5.1.2 添加新的仓库地址
微软源
[root@k8s-master01 ~]# helm repo add stable http://mirror.azure.cn/kubernetes/charts/

bitnami源
[root@k8s-master01 ~]# helm repo add bitnami https://charts.bitnami.com/bitnami

prometheus源
[root@k8s-master01 ~]# helm repo add prometheus-community https://prometheus-community.github.io/helm-charts
5.1.3 查看已经添加的仓库
[root@k8s-master01 ~]# helm repo list
NAME    URL
stable  http://mirror.azure.cn/kubernetes/charts/
5.1.4 更新仓库
[root@k8s-master01 ~]# helm repo update
Hang tight while we grab the latest from your chart repositories...
...Successfully got an update from the "stable" chart repository
Update Complete. ⎈Happy Helming!⎈
再查看
[root@master ~]# helm repo list
NAME    URL
stable  http://mirror.azure.cn/kubernetes/charts/
5.1.5删除仓库
[root@k8s-master01 ~]# helm repo remove stable
"stable" has been removed from your repositories
[root@k8s-master01 ~]# helm repo list
Error: no repositories to show
5.2 查看charts
使用helm search repo 关键字可以查看相关charts
[root@k8s-master01 ~]# helm search repo stable
NAME                                    CHART VERSION   APP VERSION             DESCRIPTION
stable/acs-engine-autoscaler            2.2.2           2.1.1                   DEPRECATED Scales worker nodes within agent pools
stable/aerospike                        0.3.5           v4.5.0.5                DEPRECATED A Helm chart for Aerospike in Kubern...
stable/airflow                          7.13.3          1.10.12                 DEPRECATED - please use: https://github.com/air...
stable/ambassador                       5.3.2           0.86.1                  DEPRECATED A Helm chart for Datawire Ambassador
stable/anchore-engine                   1.7.0           0.7.3                   Anchore container analysis and policy evaluatio...
stable/apm-server                       2.1.7           7.0.0                   DEPRECATED The server receives data from the El...
stable/ark                              4.2.2           0.10.2                  DEPRECATED A Helm chart for ark
stable/artifactory                      7.3.2           6.1.0                   DEPRECATED Universal Repository Manager support...
stable/artifactory-ha                   0.4.2           6.2.0                   DEPRECATED Universal Repository Manager support...
stable/atlantis                         3.12.4          v0.14.0                 DEPRECATED A Helm chart for Atlantis https://ww...
stable/auditbeat                        1.1.2           6.7.0                   DEPRECATED A lightweight shipper to audit the a...
stable/aws-cluster-autoscaler           0.3.4                                   DEPRECATED Scales worker nodes within autoscali...
stable/aws-iam-authenticator            0.1.5           1.0                     DEPRECATED A Helm chart for aws-iam-authenticator
stable/bitcoind                         1.0.2           0.17.1                  DEPRECATED Bitcoin is an innovative payment net...
stable/bookstack                        1.2.4           0.27.5                  DEPRECATED BookStack is a simple, self-hosted, ...
......
[root@k8s-master01 ~]# helm search repo nginx
NAME                            CHART VERSION   APP VERSION     DESCRIPTION
stable/nginx-ingress            1.41.3          v0.34.1         DEPRECATED! An nginx Ingress controller that us...
stable/nginx-ldapauth-proxy     0.1.6           1.13.5          DEPRECATED - nginx proxy with ldapauth
stable/nginx-lego               0.3.1                           Chart for nginx-ingress-controller and kube-lego
stable/gcloud-endpoints         0.1.2           1               DEPRECATED Develop, deploy, protect and monitor...
[root@k8s-master01 ~]# helm search repo tomcat
NAME            CHART VERSION   APP VERSION     DESCRIPTION
stable/tomcat   0.4.3           7.0             DEPRECATED - Deploy a basic tomcat application ...
5.3 部署应用 MySQL
环境说明:k8s集群中存在storageclass:nfs-client
我们现在安装一个 mysql 应用:
[root@k8s-master01 ~]# helm search repo mysql
NAME                                    CHART VERSION   APP VERSION     DESCRIPTION
stable/mysql                            1.6.9           5.7.30          DEPRECATED - Fast, reliable, scalable, and easy...
[root@k8s-master01 ~]# helm install stable/mysql --generate-name --set persistence.storageClass=nfs-client --set mysqlRootPassword=test123
部署过程输出的信息:
NAME: mysql-1658996042
LAST DEPLOYED: Thu Jul 28 16:14:03 2022
NAMESPACE: default
STATUS: deployed
REVISION: 1
NOTES:
MySQL can be accessed via port 3306 on the following DNS name from within your cluster:
mysql-1658996042.default.svc.cluster.local

To get your root password run:

    MYSQL_ROOT_PASSWORD=$(kubectl get secret --namespace default mysql-1658996042 -o jsonpath="{.data.mysql-root-password}" | base64 --decode; echo)

To connect to your database:

1. Run an Ubuntu pod that you can use as a client:

    kubectl run -i --tty ubuntu --image=ubuntu:16.04 --restart=Never -- bash -il

2. Install the mysql client:

    $ apt-get update && apt-get install mysql-client -y

3. Connect using the mysql cli, then provide your password:
    $ mysql -h mysql-1658996042 -p

To connect to your database directly from outside the K8s cluster:
    MYSQL_HOST=127.0.0.1
    MYSQL_PORT=3306

    # Execute the following command to route the connection:
    kubectl port-forward svc/mysql-1658996042 3306

    mysql -h ${MYSQL_HOST} -P${MYSQL_PORT} -u root -p${MYSQL_ROOT_PASSWORD}
[root@k8s-master01 ~]# helm list
NAME                    NAMESPACE       REVISION        UPDATED                                 STATUS          CHART           APP VERSION

mysql-1658996042        default         1               2022-07-28 16:14:03.530489788 +0800 CST deployed        mysql-1.6.9     5.7.30
[root@k8s-master01 ~]# kubectl get pods
NAME                                     READY   STATUS    RESTARTS   AGE
mysql-1658996042-755f5f64f6-j5s67        1/1     Running   0          82s
[root@k8s-master01 ~]# kubectl get pvc
NAME               STATUS   VOLUME                                     CAPACITY   ACCESS MODES   STORAGECLASS   AGE
mysql-1658996042   Bound    pvc-7fcb894e-5b8c-4f3e-945d-21b60b9309e5   8Gi        RWO            nfs-client     93s
[root@k8s-master01 ~]# kubectl get pv
NAME                                       CAPACITY   ACCESS MODES   RECLAIM POLICY   STATUS   CLAIM                      STORAGECLASS   REASON   AGE
pvc-7fcb894e-5b8c-4f3e-945d-21b60b9309e5   8Gi        RWO            Delete           Bound    default/mysql-1658996042   nfs-client              97s
一个 chart 包是可以多次安装到同一个集群中的,每次安装都会产生一个release, 每个release都可以独立管理和升级。
[root@k8s-master01 ~]# helm install stable/mysql --generate-name --set persistence.storageClass=nfs-client --set mysqlRootPassword=root
[root@k8s-master01 ~]# helm ls
NAME                    NAMESPACE       REVISION        UPDATED                                 STATUS          CHART           APP VERSION
mysql-1658996042        default         1               2022-07-28 16:14:03.530489788 +0800 CST deployed        mysql-1.6.9     5.7.30
mysql-1658996297        default         1               2022-07-28 16:18:19.282074215 +0800 CST deployed        mysql-1.6.9     5.7.30
[root@k8s-master01 ~]# kubectl get pods
NAME                                     READY   STATUS    RESTARTS   AGE
mysql-1658996042-755f5f64f6-j5s67        1/1     Running   0          45m
mysql-1658996297-75f6f86d84-5qd8r        1/1     Running   0          41m
nfs-client-provisioner-9d46587b5-7n2vf   1/1     Running   0          123m
[root@k8s-master01 ~]# kubectl exec -it mysql-1658996042-755f5f64f6-j5s67 -- bash
root@mysql-1658996042-755f5f64f6-j5s67:/# mysql -uroot -ptest123
mysql: [Warning] Using a password on the command line interface can be insecure.
Welcome to the MySQL monitor.  Commands end with ; or \g.
Your MySQL connection id is 547
Server version: 5.7.30 MySQL Community Server (GPL)

Copyright (c) 2000, 2020, Oracle and/or its affiliates. All rights reserved.

Oracle is a registered trademark of Oracle Corporation and/or its
affiliates. Other names may be trademarks of their respective
owners.

Type 'help;' or '\h' for help. Type '\c' to clear the current input statement.

mysql> show databases;
+--------------------+
| Database           |
+--------------------+
| information_schema |
| mysql              |
| performance_schema |
| sys                |
+--------------------+
4 rows in set (0.01 sec)
5.4 查看chart资源
[root@k8s-master01 ~]# kubectl get all -l release=mysql-1658996042
NAME                                    READY   STATUS    RESTARTS   AGE
pod/mysql-1658996042-755f5f64f6-j5s67   1/1     Running   0          72m

NAME                       TYPE        CLUSTER-IP    EXTERNAL-IP   PORT(S)    AGE
service/mysql-1658996042   ClusterIP   10.96.2.136   <none>        3306/TCP   72m

NAME                               READY   UP-TO-DATE   AVAILABLE   AGE
deployment.apps/mysql-1658996042   1/1     1            1           72m

NAME                                          DESIRED   CURRENT   READY   AGE
replicaset.apps/mysql-1658996042-755f5f64f6   1         1         1       72m
我们也可以 helm show chart 命令来了解 MySQL 这个 chart 包的一些特性:
[root@k8s-master01 ~]# helm show chart stable/mysql
apiVersion: v1
appVersion: 5.7.30
deprecated: true
description: DEPRECATED - Fast, reliable, scalable, and easy to use open-source relational
  database system.
home: https://www.mysql.com/
icon: https://www.mysql.com/common/logos/logo-mysql-170x115.png
keywords:
- mysql
- database
- sql
name: mysql
sources:
- https://github.com/kubernetes/charts
- https://github.com/docker-library/mysql
version: 1.6.9
如果想要了解更多信息,可以用 helm show all 命令:
[root@k8s-master01 ~]# helm show all stable/mysql
......
5.5 删除Release
如果需要删除这个 release,也很简单,只需要使用 helm uninstall或helm delete 命令即可:
[root@k8s-master01 ~]# helm uninstall mysql-1605195227
release "mysql-1605195227" uninstalled
uninstall 命令会从 Kubernetes 中删除 release,也会删除与 release 相关的所有 Kubernetes 资源以及 release 历史记录。
[root@k8s-master01 ~]# helm ls
NAME              NAMESPACE     REVISION     UPDATED    STATUS        CHART           APP VERSION
mysql-1605192239     default     1        .........     deployed      mysql-1.6.9       5.7.30
在删除的时候使用 --keep-history 参数,则会保留 release 的历史记录,该 release 的状态就是 UNINSTALLED,
[root@k8s-master01 ~]# helm uninstall mysql-1605192239 --keep-history
release "mysql-1605192239" uninstalled

[root@k8s-master01 ~]# helm ls -a
NAME                    NAMESPACE       REVISION        UPDATED     STATUS        CHART     APP VERSION
mysql-1605192239        default         1              ........    uninstalled     mysql-1.6.9     5.7.30
状态为uninstalled
审查历史时甚至可以取消删除release。
Usage: helm rollback <RELEASE> [REVISION] [flags]
[root@k8s-master01 ~]# helm rollback mysql-1605192239 1
Rollback was a success! Happy Helming!

[root@k8s-master01 ~]# helm ls
NAME              NAMESPACE     REVISION     UPDATED    STATUS        CHART           APP VERSION
mysql-1605192239     default     2        .........     deployed      mysql-1.6.9       5.7.30
rollback后,又回到deployed状态
5.6 定制参数部署应用
上面我们都是直接使用的 helm install 命令安装的 chart 包,这种情况下只会使用 chart 的默认配置选项,但是更多的时候,是各种各样的需求,所以我们希望根据自己的需求来定制 chart 包的配置参数。
我们可以使用 helm show values 命令来查看一个 chart 包的所有可配置的参数选项:
[root@k8s-master01 ~]# helm show values stable/mysql
......
......
上面我们看到的所有参数都是可以用自己的数据来覆盖的,可以在安装的时候通过 YAML 格式的文件来传递这些参数
1,准备参数文件
[root@k8s-master01 ~]# vim mysql-config.yml
mysqlDatabase: helm
persistence:
  enabled: true  # 没有存储卷情况下,改为false
  storageClass: nfs-client
2, 使用-f mysql-config.yml安装应用并覆盖参数
[root@k8s-master01 ~]# helm install mysql -f mysql-config.yml stable/mysql
输出内容:

NAME: mysql
LAST DEPLOYED: Fri Jul 29 14:07:17 2022
NAMESPACE: default
STATUS: deployed
REVISION: 1
NOTES:
MySQL can be accessed via port 3306 on the following DNS name from within your cluster:
mysql.default.svc.cluster.local

To get your root password run:

    MYSQL_ROOT_PASSWORD=$(kubectl get secret --namespace default mysql -o jsonpath="{.data.mysql-root-password}" | base64 --decode; echo)

To connect to your database:

1. Run an Ubuntu pod that you can use as a client:

    kubectl run -i --tty ubuntu --image=ubuntu:16.04 --restart=Never -- bash -il

2. Install the mysql client:

    $ apt-get update && apt-get install mysql-client -y

3. Connect using the mysql cli, then provide your password:
    $ mysql -h mysql -p

To connect to your database directly from outside the K8s cluster:
    MYSQL_HOST=127.0.0.1
    MYSQL_PORT=3306

    # Execute the following command to route the connection:
    kubectl port-forward svc/mysql 3306

    mysql -h ${MYSQL_HOST} -P${MYSQL_PORT} -u root -p${MYSQL_ROOT_PASSWORD}
3, 查看覆盖的参数
[root@master ~]# helm get values mysql
USER-SUPPLIED VALUES:
mysqlDatabase: helm
persistence:
  enabled: true
  storageClass: nfs-client
4, 查看部署的相关资源
[root@k8s-master01 helmdir]# kubectl get all -l release=mysql
NAME                         READY   STATUS    RESTARTS   AGE
pod/mysql-855976764d-npvgm   1/1     Running   0          40m

NAME            TYPE        CLUSTER-IP   EXTERNAL-IP   PORT(S)    AGE
service/mysql   ClusterIP   10.96.0.84   <none>        3306/TCP   40m

NAME                    READY   UP-TO-DATE   AVAILABLE   AGE
deployment.apps/mysql   1/1     1            1           40m

NAME                               DESIRED   CURRENT   READY   AGE
replicaset.apps/mysql-855976764d   1         1         1       40m
5, 查看pod的IP
[root@k8s-master01 helmdir]# kubectl get pods -o wide -l release=mysql
NAME                     READY   STATUS    RESTARTS   AGE   IP              NODE           NOMINATED NODE   READINESS GATES
mysql-855976764d-npvgm   1/1     Running   0          41m   100.119.84.71   k8s-worker01   <none>           <none>

得到pod的IP为100.119.84.71
6, 安装mysql客户端并连接测试
[root@k8s-master01 ~]# yum install mariadb -y
[root@k8s-master01 ~]# kubectl get secret --namespace default mysql -o jsonpath="{.data.mysql-root-password}" | base64 --decode; echo
wL2SD0RCsT
[root@k8s-master01 ~]# kubectl get svc
NAME         TYPE        CLUSTER-IP   EXTERNAL-IP   PORT(S)    AGE
kubernetes   ClusterIP   10.96.0.1    <none>        443/TCP    27h
mysql        ClusterIP   10.96.0.84   <none>        3306/TCP   5m21s
[root@k8s-master01 helmdir]# mysql -h 10.96.0.84 -uroot -pwL2SD0RCsT -e "show databases;"
+--------------------+
| Database           |
+--------------------+
| information_schema |
| helm               |
| mysql              |
| performance_schema |
| sys                |
+--------------------+
[root@k8s-master01 ~]# kubectl get pods -o wide -l release=mysql
NAME                     READY   STATUS    RESTARTS   AGE   IP              NODE           NOMINATED NODE   READINESS GATES
mysql-855976764d-npvgm   1/1     Running   0          41m   100.119.84.71   k8s-worker01   <none>           <none>
[root@k8s-master01 ~]# mysql -h 100.119.84.71 -uroot -pwL2SD0RCsT -e "show databases;"
+--------------------+
| Database           |
+--------------------+
| information_schema |
| helm               |
| mysql              |
| performance_schema |
| sys                |
+--------------------+
5.7 升级和回滚
当新版本的 chart 包发布的时候,或者当你要更改 release 的配置的时候,你可以使用 helm upgrade 命令来操作。升级需要一个现有的 release,并根据提供的信息对其进行升级。因为 Kubernetes charts 可能很大而且很复杂,Helm 会尝试以最小的侵入性进行升级,它只会更新自上一版本以来发生的变化:
1, 升级前查看版本
[root@k8s-master01 helmdir]# mysql -h 10.96.0.84 -uroot -pwL2SD0RCsT -e "select version()"
+-----------+
| version() |
+-----------+
| 5.7.30    |     版本为5.7.30
+-----------+

[root@k8s-master01 helmdir]#  kubectl get deployment mysql -o wide
NAME    READY   UP-TO-DATE   AVAILABLE   AGE   CONTAINERS   IMAGES         SELECTOR
mysql   1/1     1            1           54m   mysql        mysql:5.7.30   app=mysql,release=mysql
images版本为5.7.30
2,修改配置并升级
[root@k8s-master01 helmdir]# vim mysql-config.yml
mysqlDatabase: kubemsb
persistence:
  enabled: true
  storageClass: nfs-client
升级并且加一个--set imageTag=5.7.31参数设置为5.7.31版本
[root@k8s-master01 ~]# helm upgrade mysql -f mysql-config.yml --set imageTag=5.7.31 stable/mysql
升级过程中的输出:

WARNING: This chart is deprecated
Release "mysql" has been upgraded. Happy Helming!
NAME: mysql
LAST DEPLOYED: Fri Jul 29 15:04:20 2022
NAMESPACE: default
STATUS: deployed
REVISION: 2
NOTES:
MySQL can be accessed via port 3306 on the following DNS name from within your cluster:
mysql.default.svc.cluster.local

To get your root password run:

    MYSQL_ROOT_PASSWORD=$(kubectl get secret --namespace default mysql -o jsonpath="{.data.mysql-root-password}" | base64 --decode; echo)

To connect to your database:

1. Run an Ubuntu pod that you can use as a client:

    kubectl run -i --tty ubuntu --image=ubuntu:16.04 --restart=Never -- bash -il

2. Install the mysql client:

    $ apt-get update && apt-get install mysql-client -y

3. Connect using the mysql cli, then provide your password:
    $ mysql -h mysql -p

To connect to your database directly from outside the K8s cluster:
    MYSQL_HOST=127.0.0.1
    MYSQL_PORT=3306

    # Execute the following command to route the connection:
    kubectl port-forward svc/mysql 3306

    mysql -h ${MYSQL_HOST} -P${MYSQL_PORT} -u root -p${MYSQL_ROOT_PASSWORD}

 注意:更新过程中,密码会被更新,但是实际使用中,密码并未更新。
3, 升级后确认版本
[root@k8s-master01 helmdir]# kubectl get deployment mysql -o wide
NAME    READY   UP-TO-DATE   AVAILABLE   AGE   CONTAINERS   IMAGES         SELECTOR
mysql   1/1     1            1           58m   mysql        mysql:5.7.31   app=mysql,release=mysql
[root@k8s-master01 helmdir]# kubectl get pods -o wide
NAME                                     READY   STATUS    RESTARTS       AGE     IP              NODE           NOMINATED NODE   READINESS GATES
mysql-6f57f64c9d-sc72v                   1/1     Running   0              2m20s   100.119.84.72   k8s-worker01   <none>           <none>
[root@k8s-master01 helmdir]# mysql -h 100.119.84.72 -uroot -pwL2SD0RCsT -e "select version()"
+-----------+
| version() |
+-----------+
| 5.7.31    |       版本升级为5.7.31
+-----------+
4, 回滚
[root@k8s-master01 helmdir]# helm history mysql
REVISION        UPDATED                         STATUS          CHART           APP VERSION     DESCRIPTION
1               Fri Jul 29 14:07:17 2022        superseded      mysql-1.6.9     5.7.30          Install complete
2               Fri Jul 29 15:04:20 2022        deployed        mysql-1.6.9     5.7.30          Upgrade complete
[root@k8s-master01 helmdir]# helm rollback mysql 1
Rollback was a success! Happy Helming!
5, 验证
[root@k8s-master01 helmdir]# kubectl get deployment mysql -o wide
NAME    READY   UP-TO-DATE   AVAILABLE   AGE   CONTAINERS   IMAGES         SELECTOR
mysql   1/1     1            1           65m   mysql        mysql:5.7.30   app=mysql,release=mysql
[root@k8s-master01 helmdir]# helm history mysql
REVISION        UPDATED                         STATUS          CHART           APP VERSION     DESCRIPTION
1               Fri Jul 29 14:07:17 2022        superseded      mysql-1.6.9     5.7.30          Install complete
2               Fri Jul 29 15:04:20 2022        superseded      mysql-1.6.9     5.7.30          Upgrade complete
3               Fri Jul 29 15:12:24 2022        deployed        mysql-1.6.9     5.7.30          Rollback to 1
5.8 更多安装方式
和yum命令类似
- chart 仓库
- 本地 chart 压缩包
[root@k8s-master01 helmdir]# helm pull stable/mysql

[root@k8s-master01 helmdir]# ls mysql-1.6.9.tgz
mysql-1.6.9.tgz

[root@k8s-master01 helmdir]# helm install mysql2 mysql-1.6.9.tgz
- 在线的 URL(helm install fool https://example.com/charts/foo-1.2.3.tgz)
六、Chart包开发
6.1 Chart 目录结构

[root@k8s-master01 helmdir]# helm create foo

[root@k8s-master01 helmdir]# tree foo
foo
├── charts
├── Chart.yaml
├── templates
│   ├── deployment.yaml
│   ├── _helpers.tpl
│   ├── hpa.yaml
│   ├── ingress.yaml
│   ├── NOTES.txt
│   ├── serviceaccount.yaml
│   ├── service.yaml
│   └── tests
│       └── test-connection.yaml
└── values.yaml
[root@master ~]# helm pull stable/mysql

[root@master ~]# tar xf mysql-1.6.8.tgz

[root@master ~]# ls mysql
Chart.yaml  README.md  templates  values.yaml

[root@master ~]# ls -l mysql/templates/
total 48
-rwxr-xr-x 1 root root  292 Jan  1  1970 configurationFiles-configmap.yaml
-rwxr-xr-x 1 root root 8930 Jan  1  1970 deployment.yaml
-rwxr-xr-x 1 root root 1290 Jan  1  1970 _helpers.tpl
-rwxr-xr-x 1 root root  295 Jan  1  1970 initializationFiles-configmap.yaml
-rwxr-xr-x 1 root root 2036 Jan  1  1970 NOTES.txt
-rwxr-xr-x 1 root root  868 Jan  1  1970 pvc.yaml
-rwxr-xr-x 1 root root 1475 Jan  1  1970 secrets.yaml
-rwxr-xr-x 1 root root  328 Jan  1  1970 serviceaccount.yaml
-rwxr-xr-x 1 root root  800 Jan  1  1970 servicemonitor.yaml
-rwxr-xr-x 1 root root 1231 Jan  1  1970 svc.yaml
drwxr-xr-x 2 root root   50 Nov 13 18:43 tests
| 文件 | 说明 |
|---|---|
| Chart.yaml | 用于描述Chart的基本信息; helm show chart stable/mysql命令查看的内容就是此文件内容 |
| values.yaml | Chart的默认配置文件; helm show values stable/mysql命令查看的内容就是此文件内容 |
| README.md | [可选] 当前Chart的介绍 |
| LICENS | [可选] 协议 |
| requirements.yaml | [可选] 用于存放当前Chart依赖的其它Chart的说明文件 |
| charts/ | [可选]: 该目录中放置当前Chart依赖的其它Chart |
| templates/ | [可选]: 部署文件模版目录 |
6.2 创建不可配置的chart
1, 创建目录与chart.yaml
[root@k8s-master01 ~]# mkdir -p /helm/nginx/templates
[root@k8s-master01 ~]# cd  /helm/nginx
[root@k8s-master01 nginx]# vim Chart.yaml
name: helm-nginx
version: 1.0.0
apiVersion: v1
appVersion: "1.0"
description: A Helm chart for Kubernetes
2, 创建deployment.yaml
[root@k8s-master01 nginx]# vim templates/deployment.yaml
apiVersion: apps/v1
kind: Deployment
metadata:
  name: helm-nginx
spec:
  replicas: 1
  selector:
    matchLabels:
      app: helm-nginx
  template:
    metadata:
      labels:
        app: helm-nginx
    spec:
      containers:
      - name: c1
        image: nginx:1.15-alpine
        imagePullPolicy: IfNotPresent
3, 创建service.yaml
[root@k8s-master01 nginx]# vim templates/service.yaml
apiVersion: v1
kind: Service
metadata:
  name: helm-nginx
spec:
  selector:
    app: helm-nginx
  ports:
  - port: 80
    targetPort: 80
    protocol: TCP
4, 使用chart安装应用
[root@k8s-master01 nginx]# helm install /helm/nginx --generate-name
NAME: nginx-1659144826
LAST DEPLOYED: Sat Jul 30 09:33:46 2022
NAMESPACE: default
STATUS: deployed
REVISION: 1
TEST SUITE: None
5, 查看与验证
[root@k8s-master01 nginx]# helm ls
NAME                    NAMESPACE       REVISION        UPDATED                                 STATUS          CHART                   APP VERSION
nginx-1659144826        default         1               2022-07-30 09:33:46.881083524 +0800 CST deployed        helm-nginx-1.0.0
[root@k8s-master01 nginx]# kubectl get pods,service
NAME                                         READY   STATUS    RESTARTS      AGE
pod/helm-nginx-65f57fb758-nrpvf              1/1     Running   0             51s
pod/nfs-client-provisioner-9d46587b5-7n2vf   1/1     Running   4 (31m ago)   42h

NAME                 TYPE        CLUSTER-IP    EXTERNAL-IP   PORT(S)   AGE
service/helm-nginx   ClusterIP   10.96.2.120   <none>        80/TCP    51s
[root@k8s-master01 nginx]# curl http://10.96.2.120
<!DOCTYPE html>
<html>
<head>
<title>Welcome to nginx!</title>
<style>
html { color-scheme: light dark; }
body { width: 35em; margin: 0 auto;
font-family: Tahoma, Verdana, Arial, sans-serif; }
</style>
</head>
<body>
<h1>Welcome to nginx!</h1>
<p>If you see this page, the nginx web server is successfully installed and
working. Further configuration is required.</p>

<p>For online documentation and support please refer to
<a href="http://nginx.org/">nginx.org</a>.<br/>
Commercial support is available at
<a href="http://nginx.com/">nginx.com</a>.</p>

<p><em>Thank you for using nginx.</em></p>
</body>
</html>
6, 删除
[root@k8s-master01 ~]# helm uninstall nginx-1659144826
release "nginx-1659144826" uninstalled
6.3 创建可配置的Chart
6.3.1 官方的预定义变量
- Release.Name:发布的名称(不是chart)
- Release.Time:chart发布上次更新的时间。这将匹配Last ReleasedRelease对象上的时间。
- Release.Namespace:chart发布到的名称空间。
- Release.Service:进行发布的服务。
- Release.IsUpgrade:如果当前操作是升级或回滚,则设置为true。
- Release.IsInstall:如果当前操作是安装,则设置为true。
- Release.Revision:修订号。它从1开始,每个都递增helm upgrade。
- Chart:内容Chart.yaml。因此,chart版本可以Chart.Version和维护者一样获得 Chart.Maintainers。
- Files:类似于chart的对象,包含chart中的所有非特殊文件。这不会授予您访问模板的权限,但可以访问存在的其他文件(除非使用它们除外.helmignore)。可以使用{{index .Files "file.name"}}或使用{{.Files.Get name}}或 {{.Files.GetStringname}}函数访问文件。您也可以访问该文件的内容,[]byte使用{{.Files.GetBytes}}
- Capabilities:类似于地图的对象,包含有关Kubernetes({{.Capabilities.KubeVersion}},Tiller({{.Capabilities.TillerVersion}}和支持的Kubernetes API)版本({{.Capabilities.APIVersions.Has "batch/v1")的版本的信息
6.3.2 新增values.yaml文件
[root@k8s-master01 nginx]# pwd
/helm/nginx
[root@k8s-master01 nginx]# vim values.yaml
image:
  repository: nginx
  tag: '1.15-alpine'
replicas: 2
6.3.3 配置deploy引用values的值
[root@k8s-master01 nginx]# vim templates/deployment.yaml
apiVersion: apps/v1
kind: Deployment
metadata:
  name: helm-nginx
spec:
  replicas: {{ .Values.replicas }}
  selector:
    matchLabels:
      app: helm-nginx
  template:
    metadata:
      labels:
        app: helm-nginx
    spec:
      containers:
      - name: helm-nginx
        image: {{ .Values.image.repository }}:{{ .Values.image.tag }}
        imagePullPolicy: IfNotPresent
6.3.4 测试
6.3.4.1 直接应用测试
deployment.yaml将直接使用values.yaml中的配置
[root@k8s-master01 nginx]# helm install helm-nginx-new /helm/nginx
NAME: helm-nginx-new
LAST DEPLOYED: Sat Jul 30 09:44:21 2022
NAMESPACE: default
STATUS: deployed
REVISION: 1
TEST SUITE: None
[root@k8s-master01 nginx]# kubectl get pods
NAME                                     READY   STATUS    RESTARTS      AGE
helm-nginx-65f57fb758-pcmkg              1/1     Running   0             38s
helm-nginx-65f57fb758-rmmv5              1/1     Running   0             38s
6.3.4.2 通过命令行设置变量后干运行测试
通过在命令行设置变量为deployment.yaml赋值,使用--set选项,使用
--dry-run选项来打印出生成的清单文件内容,而不执行部署
[root@k8s-master01 nginx]# helm install helm-nginx --set replicas=3 /helm/nginx/ --dry-run
NAME: helm-nginx
LAST DEPLOYED: Fri Nov 13 20:57:45 2020
NAMESPACE: default
STATUS: pending-install                                     状态表示是测试,不是真的部署了
REVISION: 1
TEST SUITE: None
HOOKS:
MANIFEST:
---
# Source: helm-nginx/templates/service.yaml
apiVersion: v1
kind: Service
metadata:
  name: helm-nginx
spec:
  selector:
    app: helm-nginx
  ports:
  - port: 80
    targetPort: 80
    protocol: TCP
---
# Source: helm-nginx/templates/deployment.yaml
apiVersion: apps/v1
kind: Deployment
metadata:
  name: helm-nginx
spec:
  replicas: 3                                               副本数量3传参成功
  selector:
    matchLabels:
      app: helm-nginx
  template:
    metadata:
      labels:
        app: helm-nginx
    spec:
      containers:
      - name: helm-nginx
        image: nginx:1.15-alpine                            镜像名:TAG 传参成功
        imagePullPolicy: IfNotPresent
[root@k8s-master01 nginx]# helm install helm-nginx --set replicas=3 /helm/nginx
NAME: helm-nginx
LAST DEPLOYED: Sat Jul 30 09:54:00 2022
NAMESPACE: default
STATUS: deployed
REVISION: 1
TEST SUITE: None
[root@k8s-master01 nginx]# helm ls
NAME            NAMESPACE       REVISION        UPDATED                                 STATUS          CHART                   APP VERSION
helm-nginx      default         1               2022-07-30 09:54:00.744748457 +0800 CST deployed        helm-nginx-1.0.0
[root@k8s-master01 nginx]# kubectl get pods,svc
NAME                                         READY   STATUS    RESTARTS      AGE
pod/helm-nginx-65f57fb758-j768m              1/1     Running   0             59s
pod/helm-nginx-65f57fb758-pscjh              1/1     Running   0             58s
pod/helm-nginx-65f57fb758-s6qqj              1/1     Running   0             58s


NAME                 TYPE        CLUSTER-IP    EXTERNAL-IP   PORT(S)   AGE
service/helm-nginx   ClusterIP   10.96.1.197   <none>        80/TCP    59s
6.3.5将Chart包进行打包
将chart打包成一个压缩文件,便于存储与分享。
[root@k8s-master01 nginx]# helm package .
Successfully packaged chart and saved it to: /helm/nginx/helm-nginx-1.0.0.tgz
[root@k8s-master01 nginx]# ls
Chart.yaml  helm-nginx-1.0.0.tgz  templates  values.yaml
打包出mychart-0.1.0.tgz文件
6.3.6 使用Chart安装
[root@master nginx]# helm install helm-nginx2 /helm/nginx/helm-nginx-1.0.0.tgz
七、Chart包托管至Harbor方案
7.1 集群外harbor服务器准备
7.1.1 docker-ce安装
wget https://mirrors.aliyun.com/docker-ce/linux/centos/docker-ce.repo -O /etc/yum.repos.d/docker-ce.repo
[root@nfsserver harbor]# yum -y install docker-ce
[root@nfsserver harbor]# systemctl enable --now docker
7.1.2 docker-compose安装
[root@nfsserver ~]# wget https://github.com/docker/compose/releases/download/1.25.0/docker-compose-Linux-x86_64
[root@nfsserver ~]# mv docker-compose-Linux-x86_64 /usr/bin/docker-compose
[root@nfsserver ~]# chmod +x /usr/bin/docker-compose
[root@nfsserver ~]# docker-compose version
docker-compose version 1.25.0, build 0a186604
docker-py version: 4.1.0
CPython version: 3.7.4
OpenSSL version: OpenSSL 1.1.0l  10 Sep 2019
7.1.3 harbor服务器安装
[root@nfsserver ~]# wget https://github.com/goharbor/harbor/releases/download/v2.5.3/harbor-offline-installer-v2.5.3.tgz
[root@nfsserver harbor]# ls
6864844_kubemsb.com.key  6864844_kubemsb.com.pem  common.sh  harbor.v2.5.3.tar.gz  harbor.yml.tmpl  install.sh  LICENSE  prepare
[root@nfsserver harbor]# mv harbor.yml.tmpl harbor.yml
# vim harbor.yaml

# Configuration file of Harbor

# The IP address or hostname to access admin UI and registry service.
# DO NOT use localhost or 127.0.0.1, because Harbor needs to be accessed by external clients.
hostname: www.kubemsb.com

# http related config
http:
  # port for http, default is 80. If https enabled, this port will redirect to https port
  port: 80

# https related config
https:
  # https port for harbor, default is 443
  port: 443
  # The path of cert and key files for nginx
  certificate: /home/harbor/6864844_kubemsb.com.pem
  private_key: /home/harbor/6864844_kubemsb.com.key

# # Uncomment following will enable tls communication between all harbor components
# internal_tls:
#   # set enabled to true means internal tls is enabled
#   enabled: true
#   # put your cert and key files on dir
#   dir: /etc/harbor/tls/internal

# Uncomment external_url if you want to enable external proxy
# And when it enabled the hostname will no longer used
# external_url: https://reg.mydomain.com:8433

# The initial password of Harbor admin
# It only works in first time to install harbor
# Remember Change the admin password from UI after launching Harbor.
harbor_admin_password: 12345

# Harbor DB configuration
[root@nfsserver harbor]# ./prepare
[root@nfsserver harbor]# ./install.sh -h

Note: Please set hostname and other necessary attributes in harbor.yml first. DO NOT use localhost or 127.0.0.1 for hostname, because Harbor needs to be accessed by external clients.
Please set --with-notary if needs enable Notary in Harbor, and set ui_url_protocol/ssl_cert/ssl_cert_key in harbor.yml bacause notary must run under https.
Please set --with-trivy if needs enable Trivy in Harbor
Please set --with-chartmuseum if needs enable Chartmuseum in Harbor
[root@nfsserver harbor]# ./install.sh --with-chartmuseum
[root@nfsserver harbor]# docker ps
在主机上解决域名 192.168.10.146 www.kubemsb.com
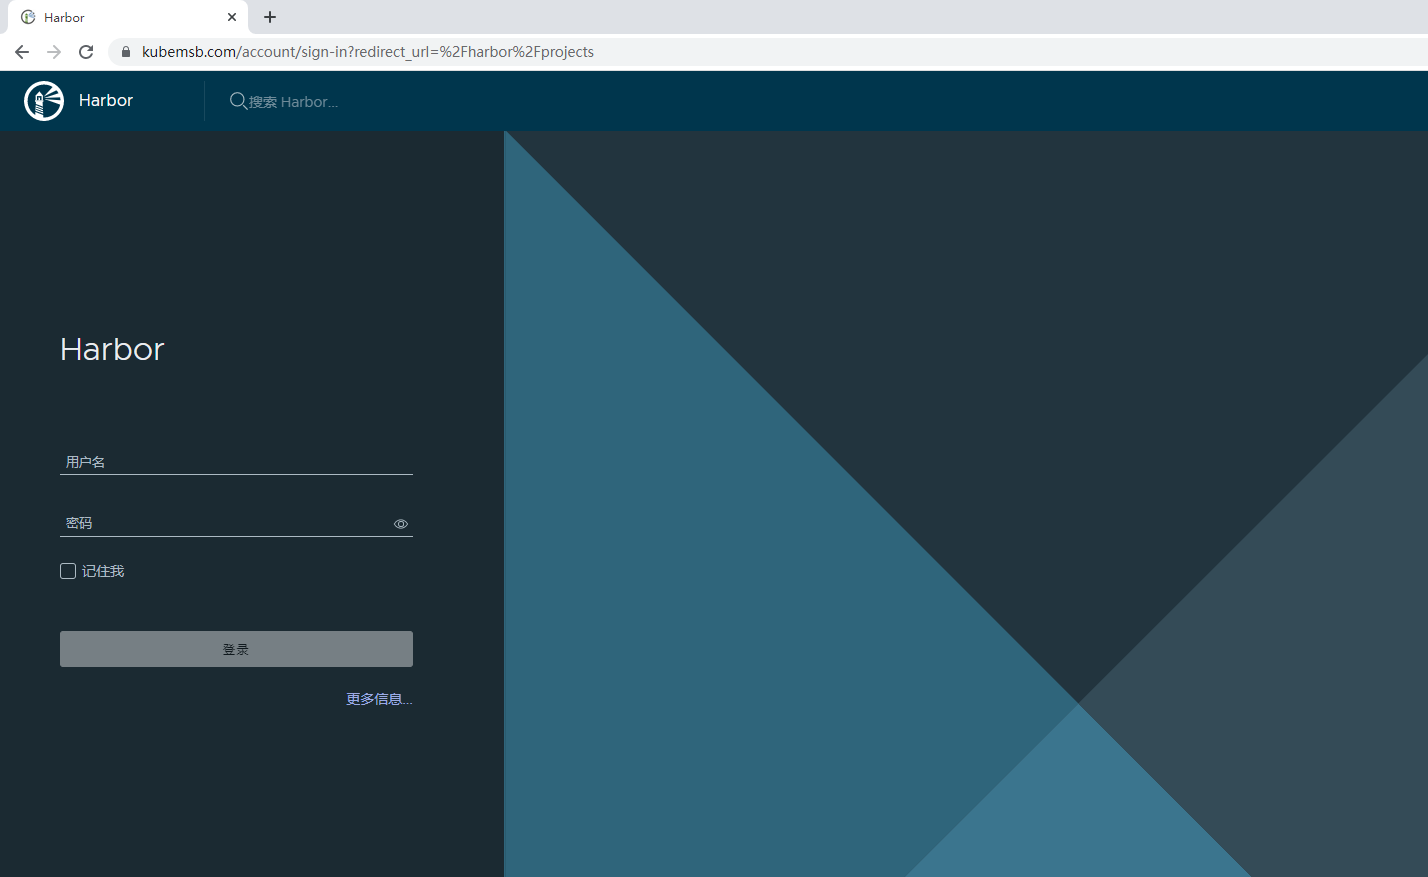
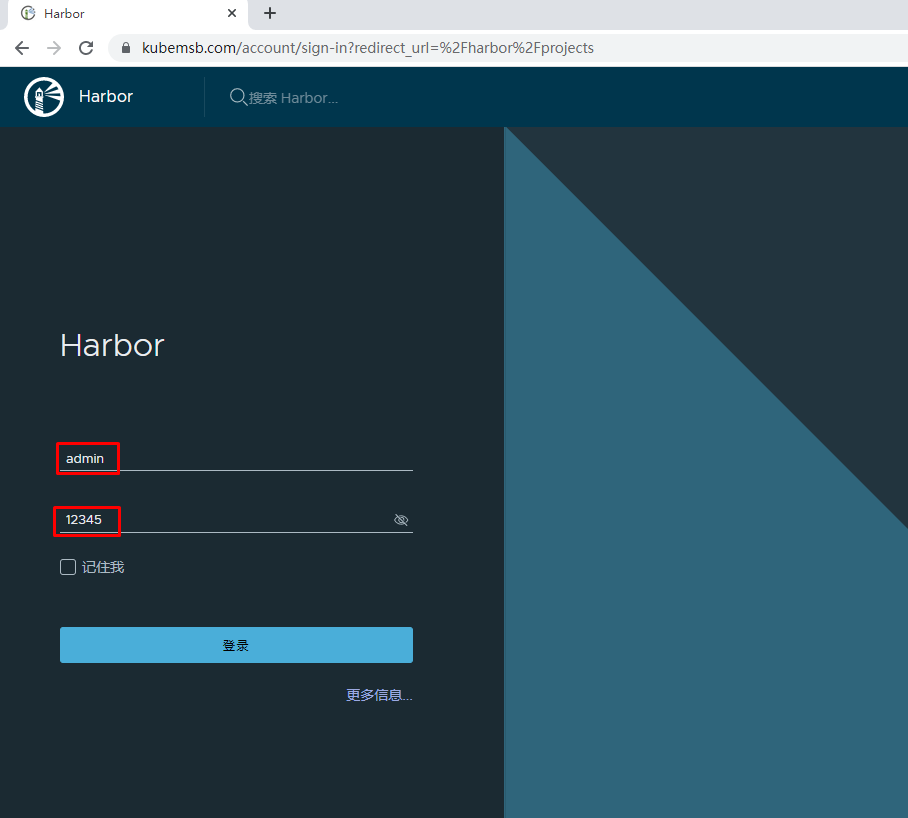
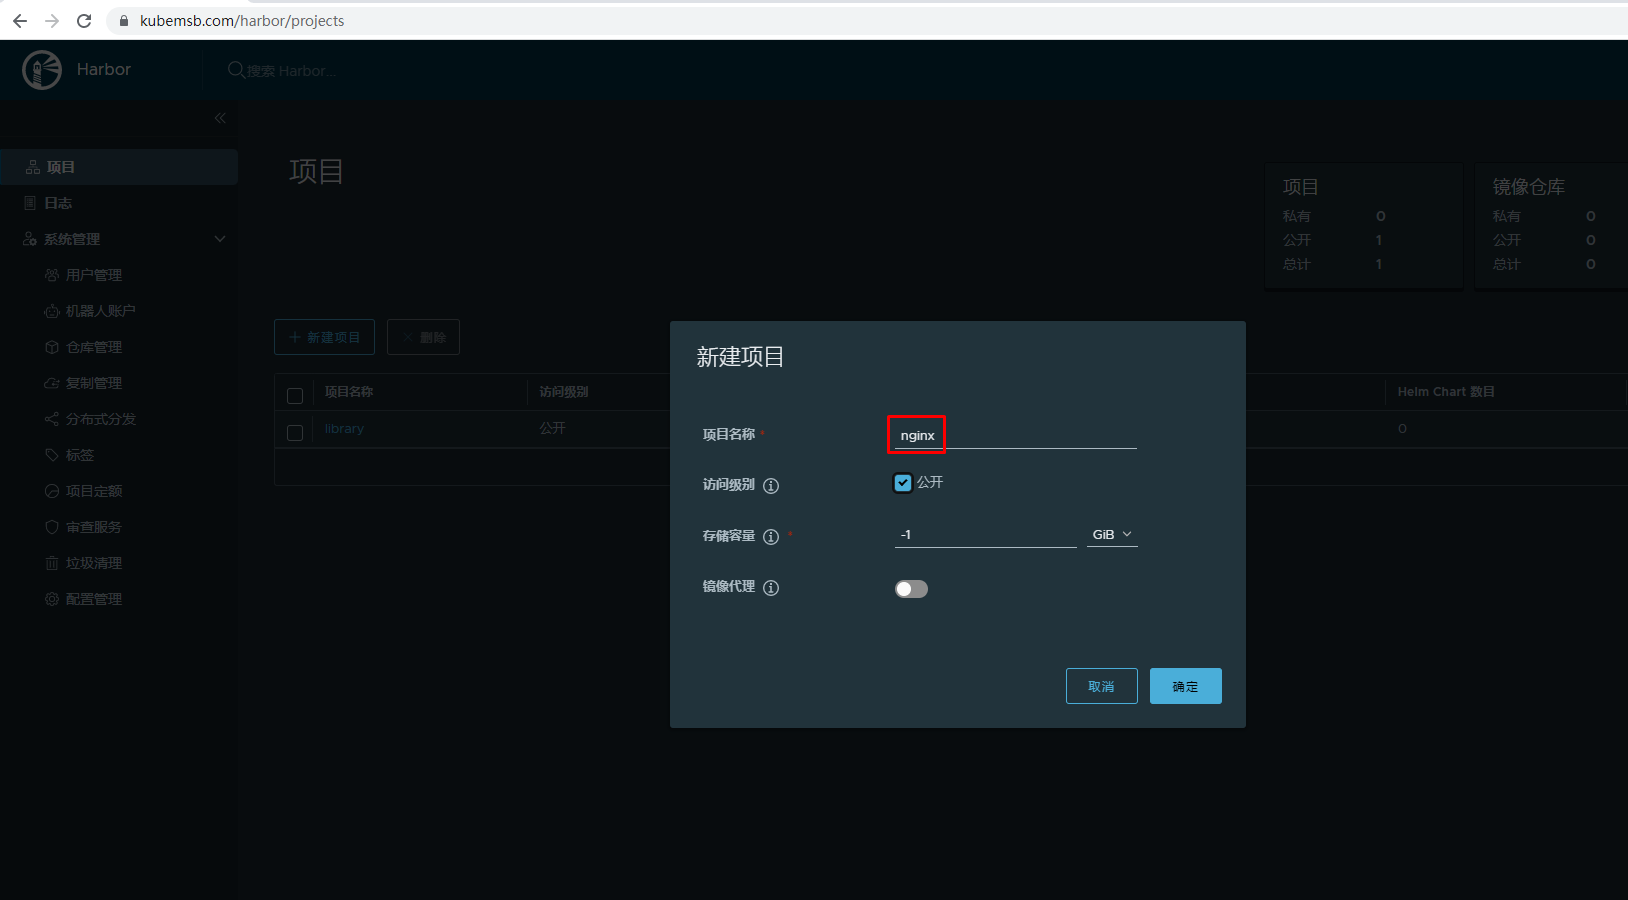
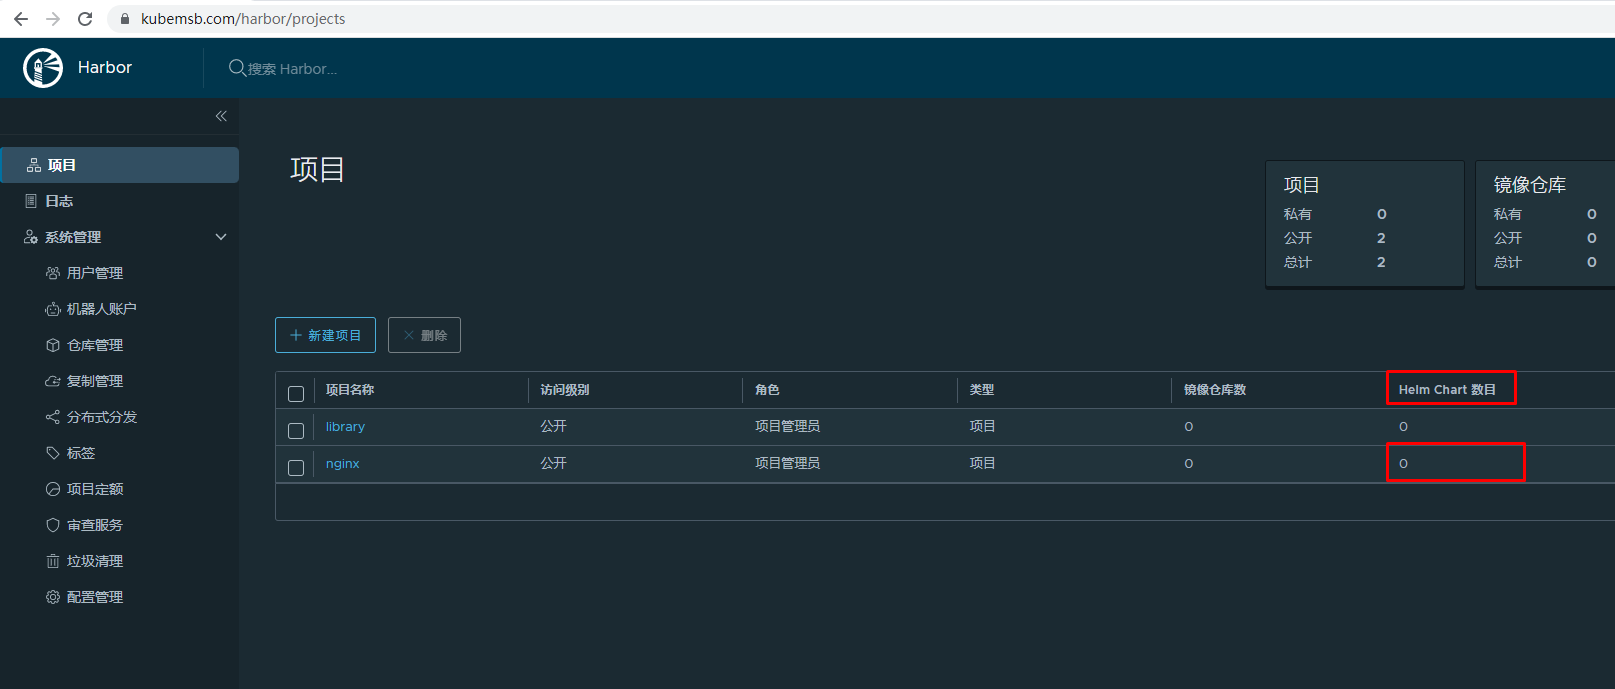
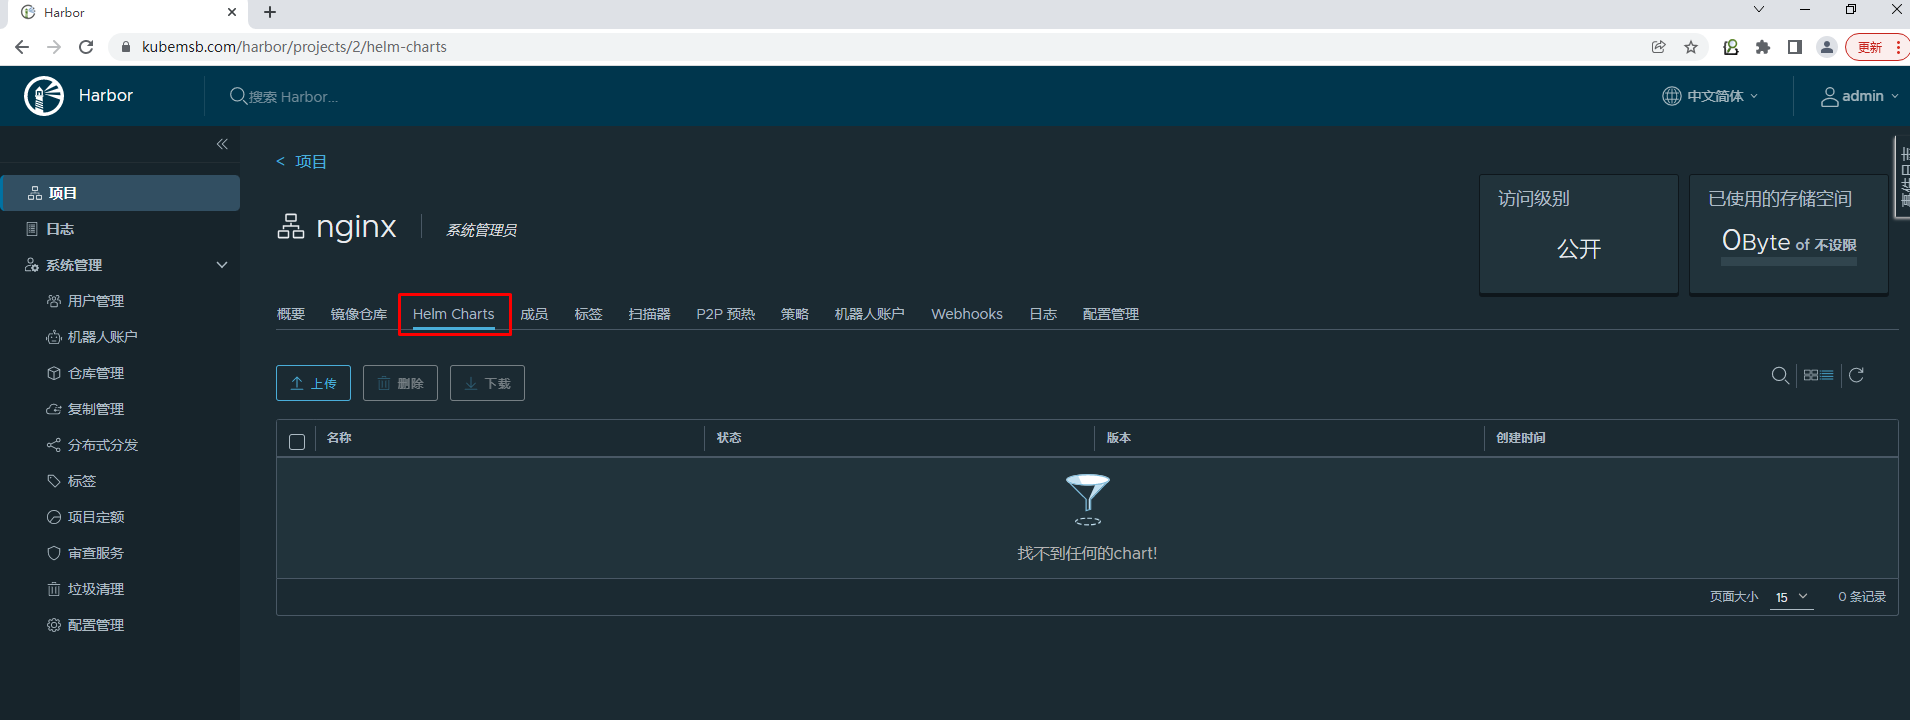
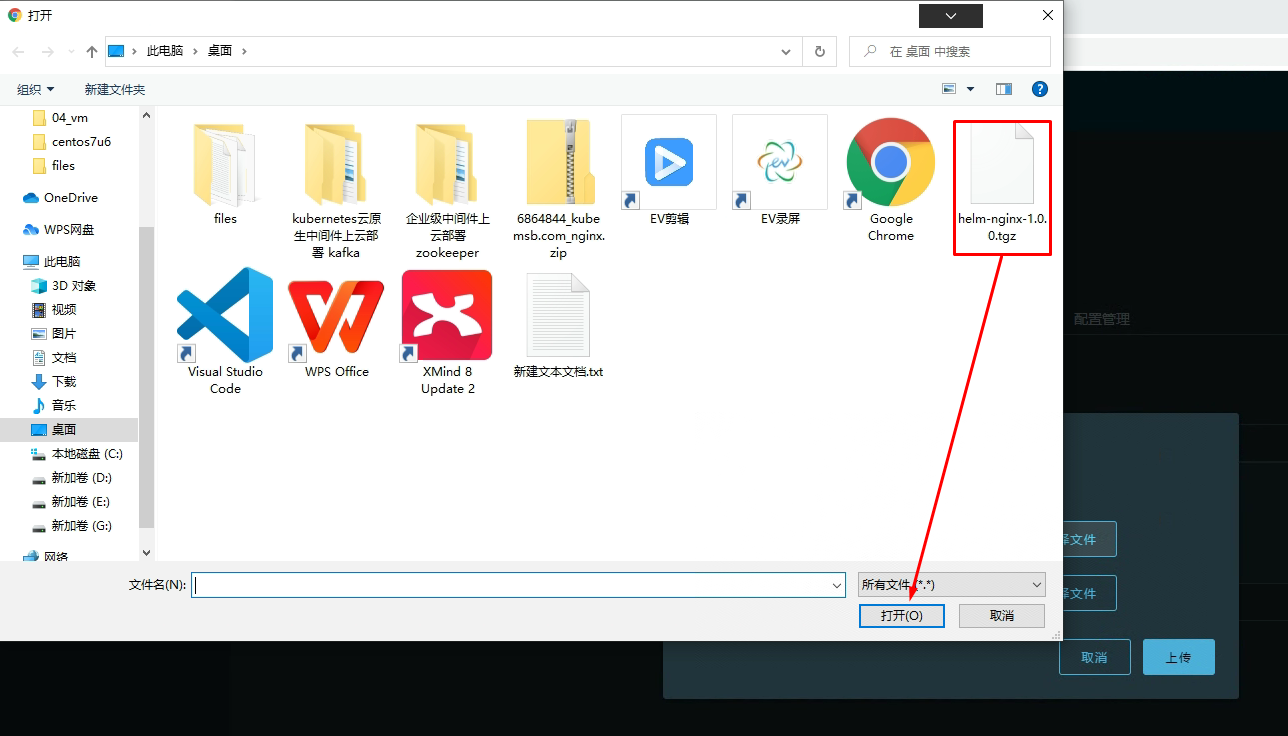
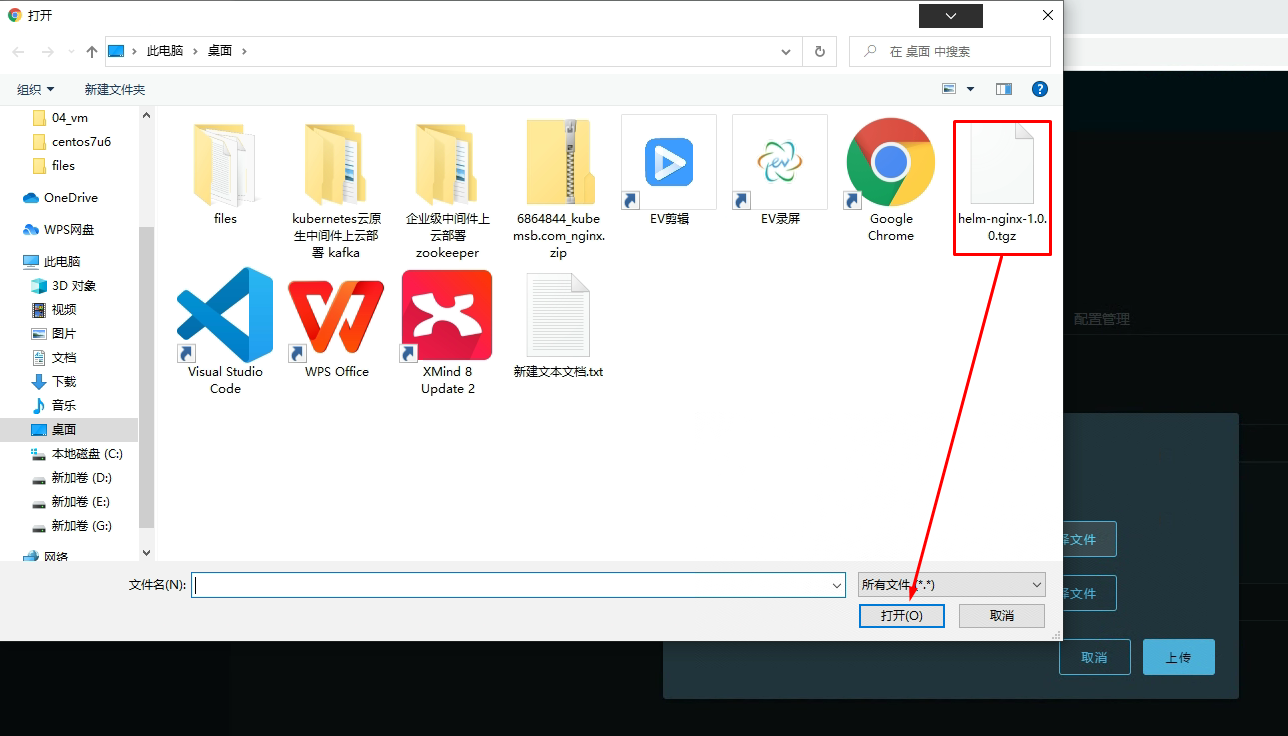
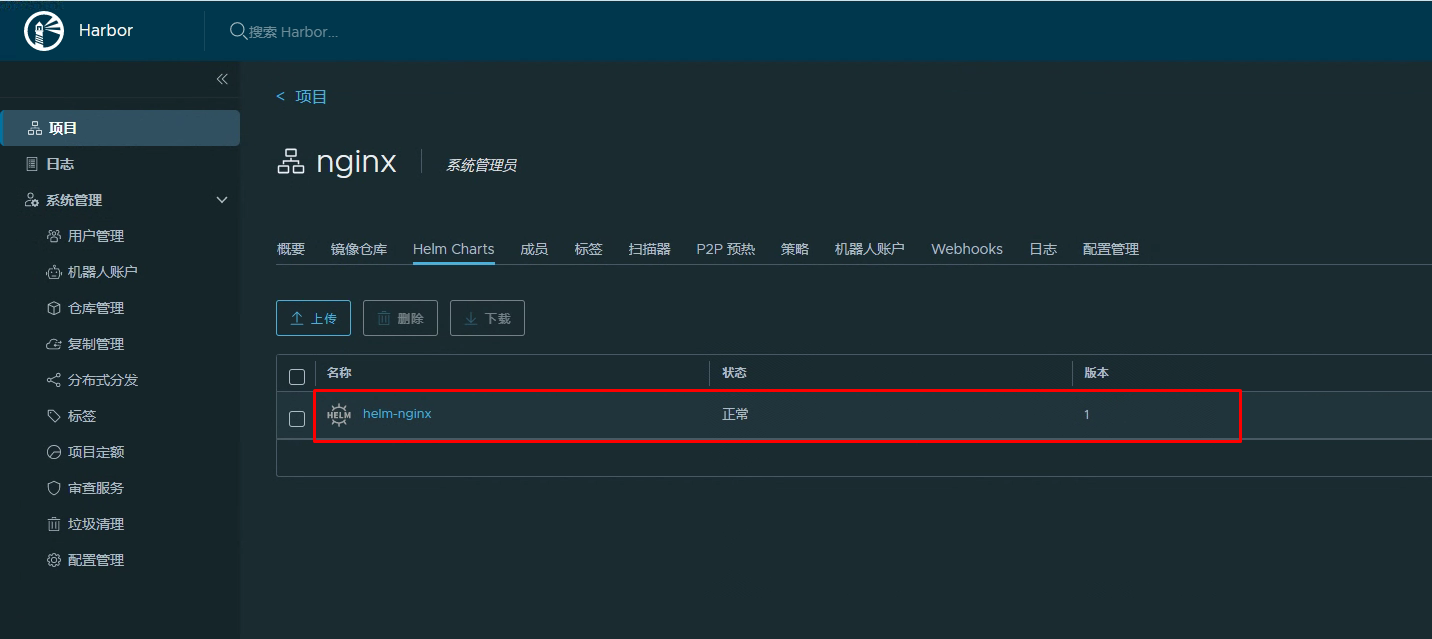
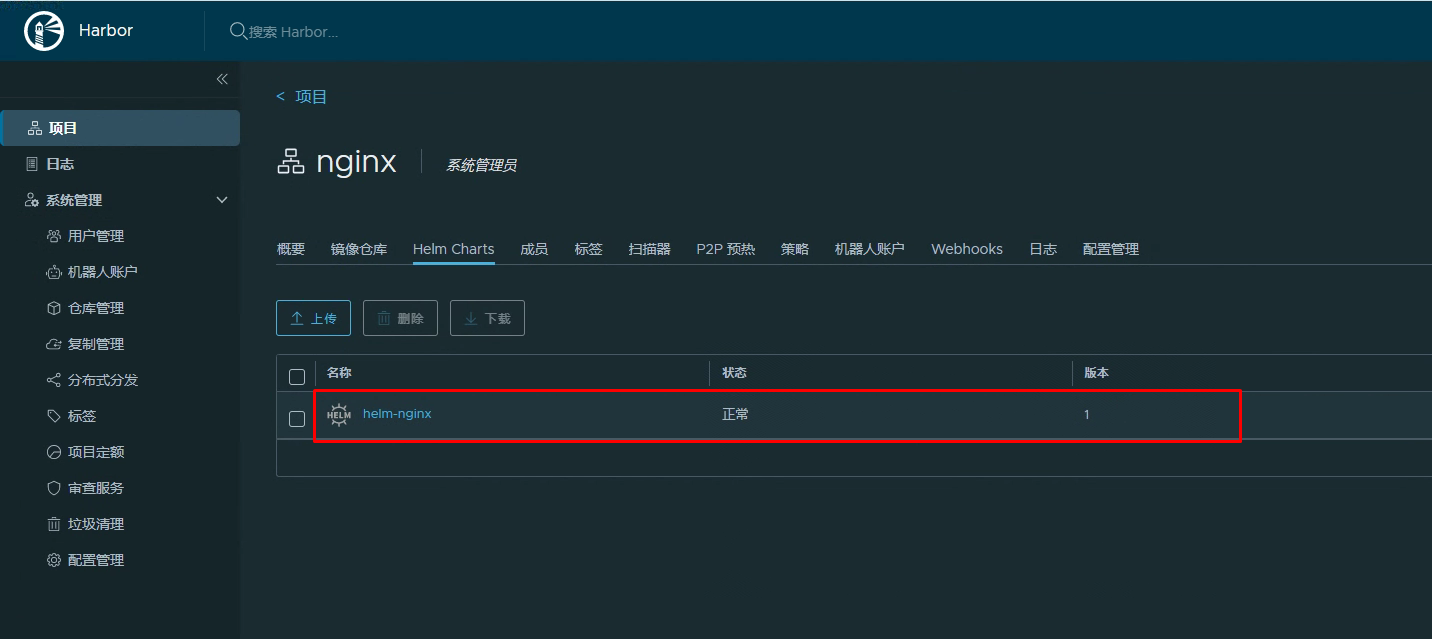
[root@k8s-master01 ~]# helm repo add harborhelm https://www.kubemsb.com/chartrepo/nginx --username admin --password 12345
"harborhelm" has been added to your repositories
[root@k8s-master01 ~]# helm repo list
NAME                    URL
micosoft                http://mirror.azure.cn/kubernetes/charts/
prometheus-community    https://prometheus-community.github.io/helm-charts
harborhelm              https://www.kubemsb.com/chartrepo/nginx
[root@k8s-master01 ~]# helm search repo helm-nginx
NAME                    CHART VERSION   APP VERSION     DESCRIPTION
harborhelm/helm-nginx   1.0.0
[root@k8s-master01 ~]# helm install helm-nginx-test harborhelm/helm-nginx
NAME: helm-nginx-test
LAST DEPLOYED: Sat Jul 30 20:32:05 2022
NAMESPACE: default
STATUS: deployed
REVISION: 1
TEST SUITE: None
[root@k8s-master01 ~]# helm ls
NAME            NAMESPACE       REVISION        UPDATED                                 STATUS          CHART                   APP VERSION
helm-nginx-test default         1               2022-07-30 20:32:05.138180077 +0800 CST deployed        helm-nginx-1.0.0
[root@k8s-master01 ~]# kubectl get pods
NAME                                     READY   STATUS    RESTARTS      AGE
helm-nginx-65f57fb758-2hkl6              1/1     Running   0             8s
helm-nginx-65f57fb758-v427b              1/1     Running   0             8s
安装helmpush插件
需要安装helmpush插件才能上传
- 在线直接安装
[root@k8s-master01 nginx]# helm plugin install https://github.com/chartmuseum/helm-push
Downloading and installing helm-push v0.10.3 ...
https://github.com/chartmuseum/helm-push/releases/download/v0.10.3/helm-push_0.10.3_linux_amd64.tar.gz
Installed plugin: cm-push
[root@k8s-master01 nginx]# ls /root/.local/share/helm/plugins/helm-push/bin/
.  ..  helm-cm-push
将打包应用push到harbor
[root@k8s-master01 nginx]# ls
Chart.yaml  templates  values.yaml

[root@k8s-master01 nginx]# vim Chart.yaml
name: helm-nginx
version: 1.1.0

[root@k8s-master01 nginx]# helm package .

Successfully packaged chart and saved it to: /helm/nginx/helm-nginx-1.1.0.tgz
[root@k8s-master01 nginx]# ls
Chart.yaml  helm-nginx-1.1.0.tgz  templates  values.yaml
[root@k8s-master01 nginx]# helm -h
The Kubernetes package manager
...
Available Commands:
  cm-push     Please see https://github.com/chartmuseum/helm-push for usage
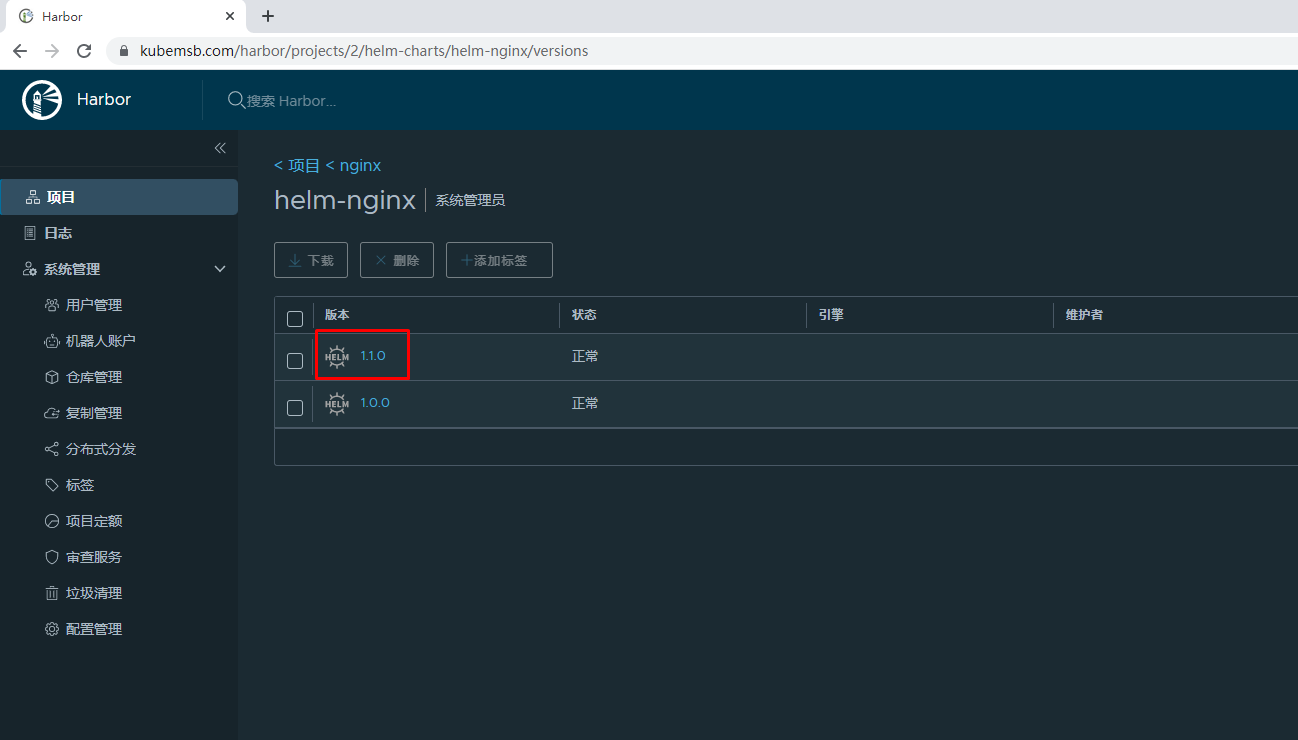
[root@k8s-master01 nginx]# helm cm-push --username admin --password 12345 helm-nginx-1.1.0.tgz harborhelm
Pushing helm-nginx-1.1.0.tgz to harborhelm...
Done.
八、Helm Chart包可视化管理 Kubeapps应用商店
8.1 kubeapps介绍
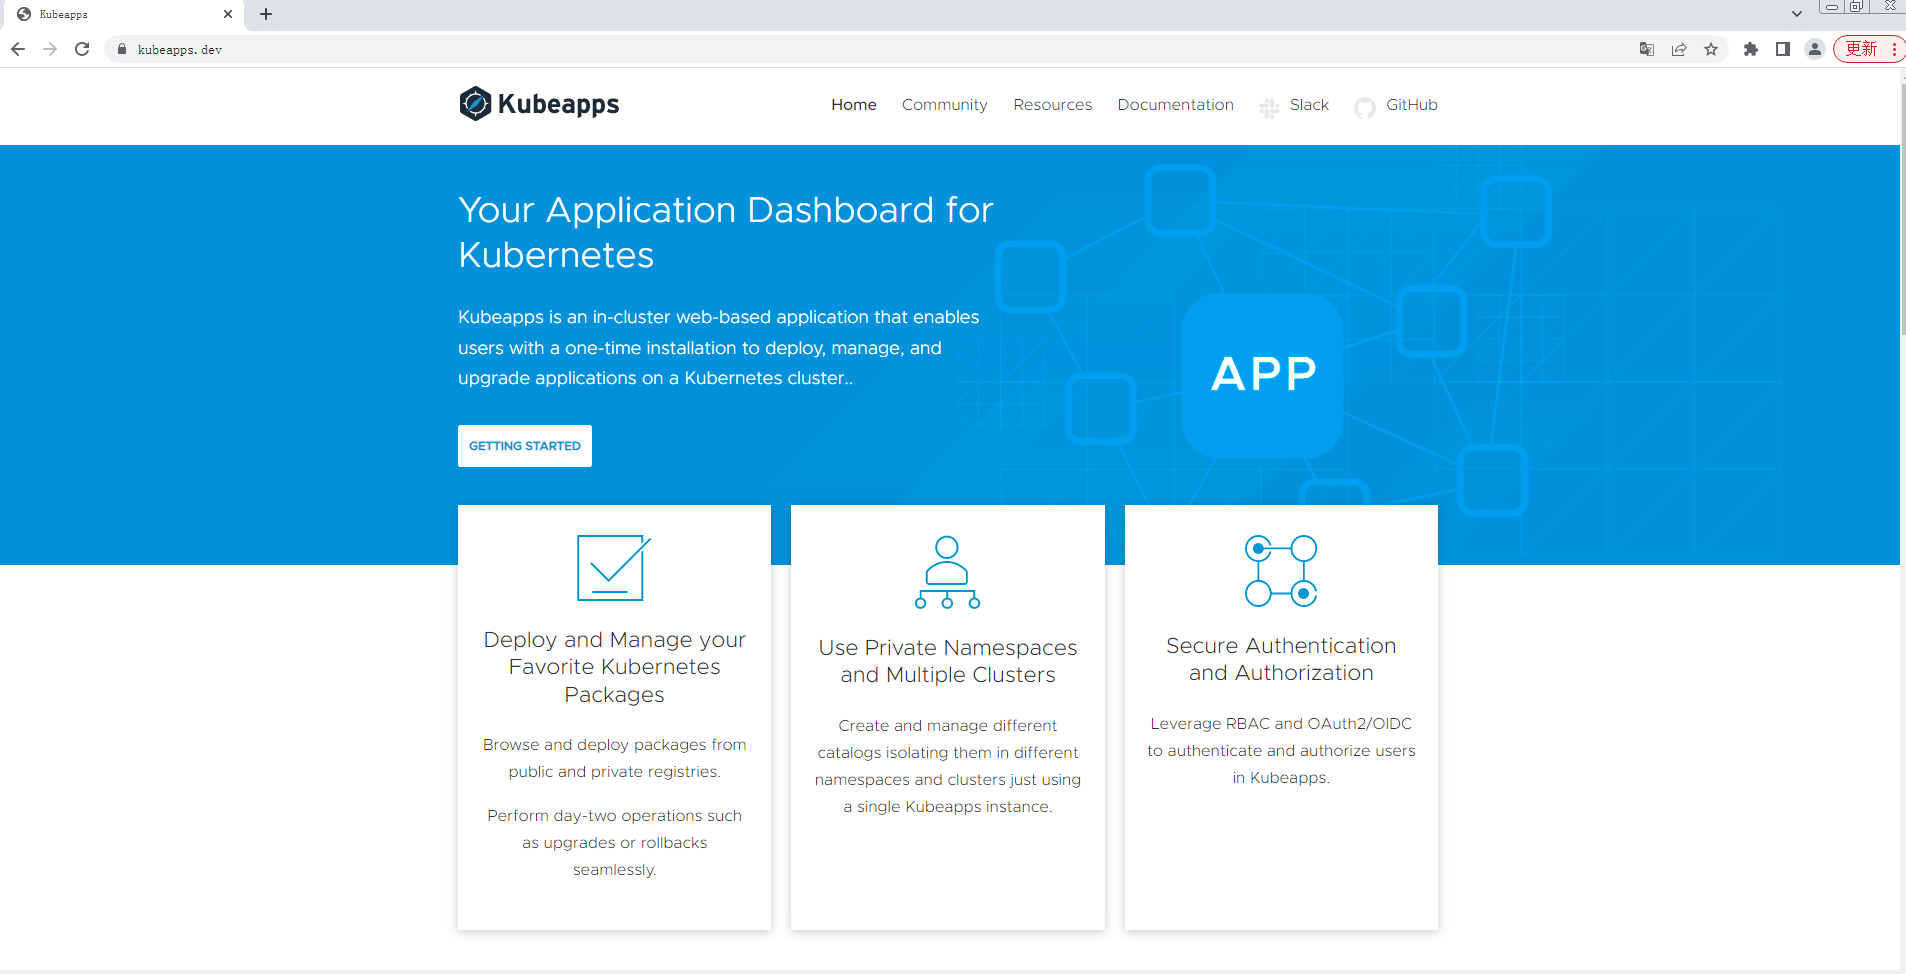
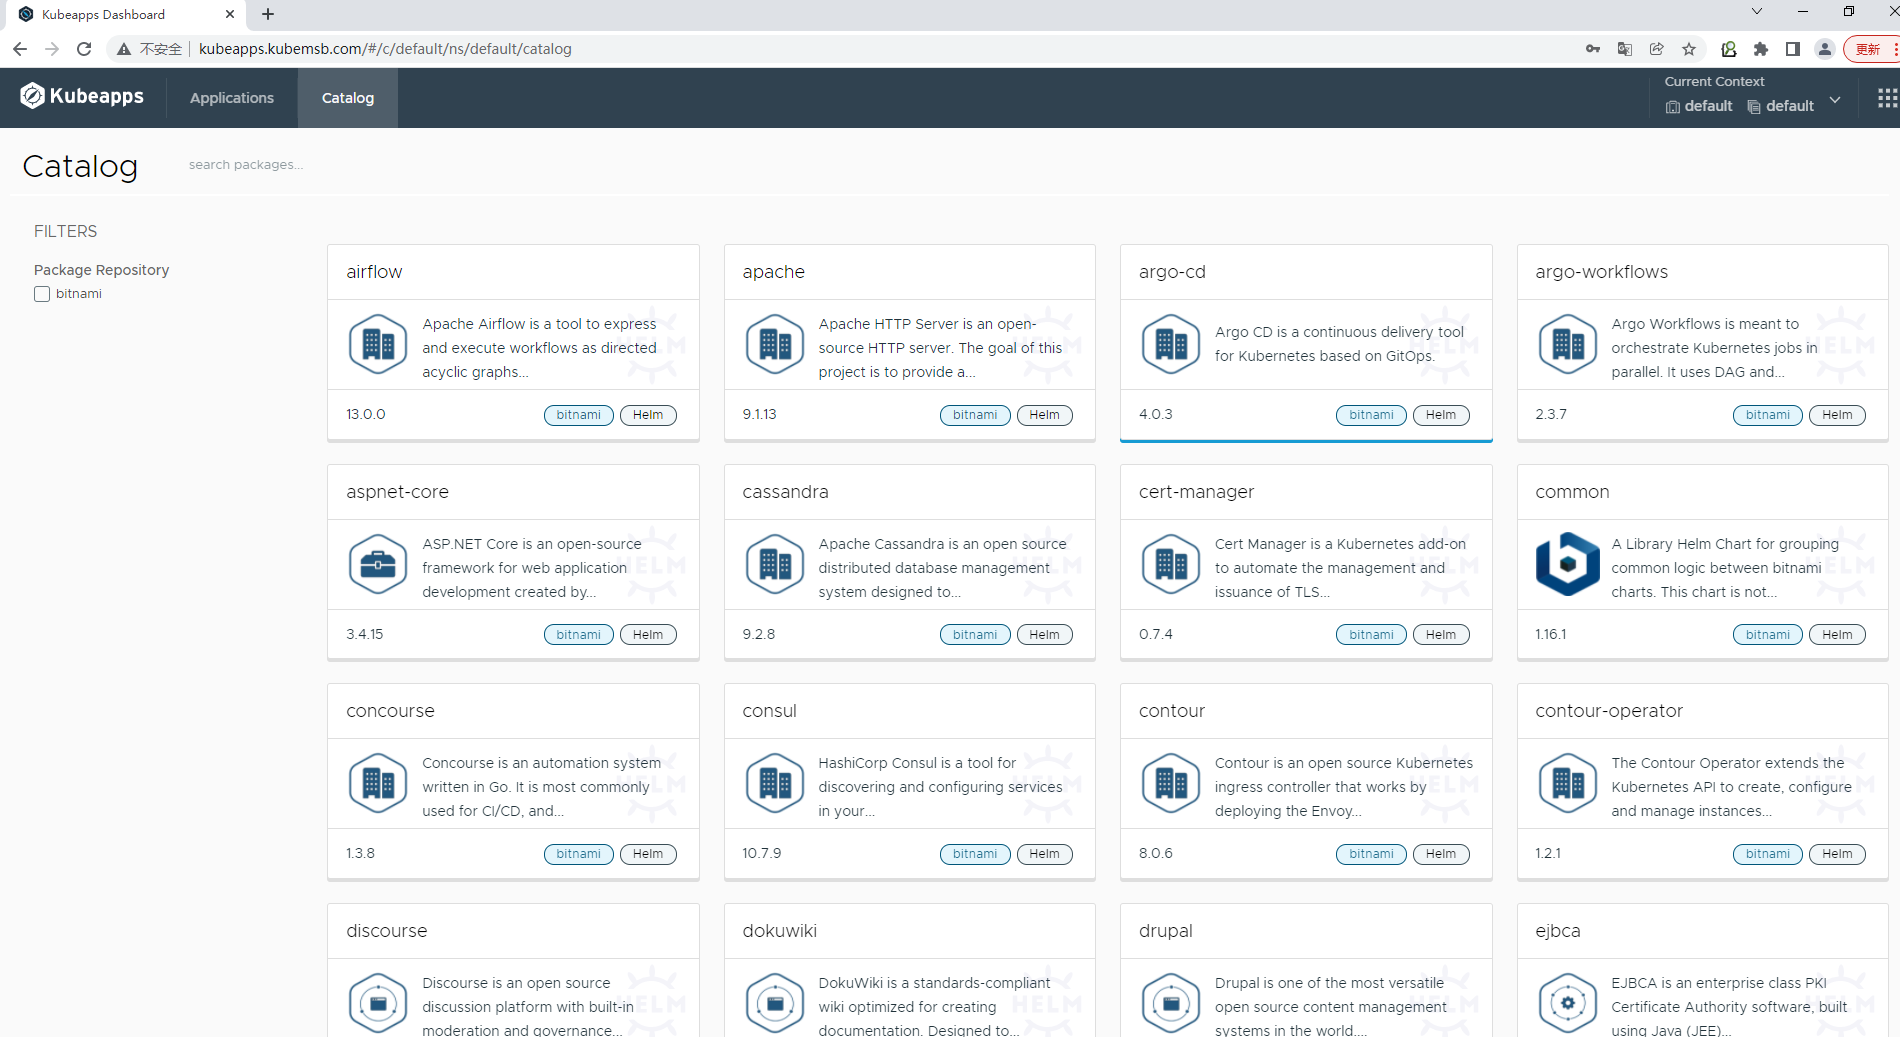
Kubeapps提供了一个开源的Helm UI界面,方便以图形界面的形式管理Helm应用。
- 部署应用。可从公共或私有仓库中浏览chart并将其部署到集群中;
- 管理应用。升级、管理和删除部署在kubernetes集群中的应用程序;
- 搜索功能。Kubeapps提供chart搜索页面;
8.2 使用helm部署kubeapps
[root@k8s-master01 ~]# helm repo add bitnami https://charts.bitnami.com/bitnami
"bitnami" has been added to your repositories
[root@k8s-master01 ~]# helm repo list
NAME                    URL
micosoft                http://mirror.azure.cn/kubernetes/charts/
prometheus-community    https://prometheus-community.github.io/helm-charts
harborhelm              https://www.kubemsb.com/chartrepo/nginx
bitnami                 https://charts.bitnami.com/bitnami
[root@k8s-master01 ~]# helm repo update
Hang tight while we grab the latest from your chart repositories...
...Successfully got an update from the "harborhelm" chart repository
...Successfully got an update from the "prometheus-community" chart repository
...Successfully got an update from the "micosoft" chart repository
...Successfully got an update from the "bitnami" chart repository
Update Complete. ⎈Happy Helming!⎈
[root@k8s-master01 ~]# helm search repo kubeapps
NAME                    CHART VERSION   APP VERSION     DESCRIPTION
bitnami/kubeapps        10.0.2          2.4.6           Kubeapps is a web-based UI for launching and ma...
[root@k8s-master01 ~]# kubectl create ns kubeapps
namespace/kubeapps created
[root@k8s-master01 ~]# helm install kubeapps bitnami/kubeapps --namespace kubeapps
输出信息:
NAME: kubeapps
LAST DEPLOYED: Sun Jul 31 00:00:03 2022
NAMESPACE: kubeapps
STATUS: deployed
REVISION: 1
TEST SUITE: None
NOTES:
CHART NAME: kubeapps
CHART VERSION: 10.0.2
APP VERSION: 2.4.6** Please be patient while the chart is being deployed **

Tip:

  Watch the deployment status using the command: kubectl get pods -w --namespace kubeapps

Kubeapps can be accessed via port 80 on the following DNS name from within your cluster:

   kubeapps.kubeapps.svc.cluster.local

To access Kubeapps from outside your K8s cluster, follow the steps below:

1. Get the Kubeapps URL by running these commands:
   echo "Kubeapps URL: http://127.0.0.1:8080"
   kubectl port-forward --namespace kubeapps service/kubeapps 8080:80

2. Open a browser and access Kubeapps using the obtained URL.
[root@k8s-master01 ~]# kubectl get pods -n kubeapps
NAME                                                         READY   STATUS    RESTARTS   AGE
apprepo-kubeapps-sync-bitnami-w5jlr-6nvsl                    1/1     Running   0          30s
kubeapps-994b988b5-dlp9r                                     1/1     Running   0          96s
kubeapps-994b988b5-ttxv8                                     1/1     Running   0          96s
kubeapps-internal-apprepository-controller-c78bf86bc-lcpz2   1/1     Running   0          96s
kubeapps-internal-dashboard-6445c69c6b-fgkrs                 1/1     Running   0          96s
kubeapps-internal-dashboard-6445c69c6b-phmxn                 1/1     Running   0          96s
kubeapps-internal-kubeappsapis-c5d8cbb7f-6rnnl               1/1     Running   0          96s
kubeapps-internal-kubeappsapis-c5d8cbb7f-9jthp               1/1     Running   0          96s
kubeapps-internal-kubeops-58794f58c8-bkjtc                   1/1     Running   0          96s
kubeapps-internal-kubeops-58794f58c8-qk655                   1/1     Running   0          96s
kubeapps-postgresql-0                                        1/1     Running   0          96s
[root@k8s-master01 ~]# kubectl get svc -n kubeapps
NAME                             TYPE        CLUSTER-IP    EXTERNAL-IP   PORT(S)    AGE
kubeapps                         ClusterIP   10.96.2.39    <none>        80/TCP     2m18s
kubeapps-internal-dashboard      ClusterIP   10.96.1.130   <none>        8080/TCP   2m18s
kubeapps-internal-kubeappsapis   ClusterIP   10.96.2.40    <none>        8080/TCP   2m18s
kubeapps-internal-kubeops        ClusterIP   10.96.3.116   <none>        8080/TCP   2m18s
kubeapps-postgresql              ClusterIP   10.96.0.235   <none>        5432/TCP   2m18s
kubeapps-postgresql-hl           ClusterIP   None          <none>        5432/TCP   2m18s
8.3 访问kubeapps
[root@k8s-master01 ~]# vim kubeapps-ingress.yaml

[root@k8s-master01 ~]# cat kubeapps-ingress.yaml
apiVersion: networking.k8s.io/v1
kind: Ingress
metadata:
  name: ingress-kubeapps                    #自定义ingress名称
  namespace: kubeapps
  annotations:
    ingressclass.kubernetes.io/is-default-class: "true"
    kubernetes.io/ingress.class: nginx
spec:
  rules:
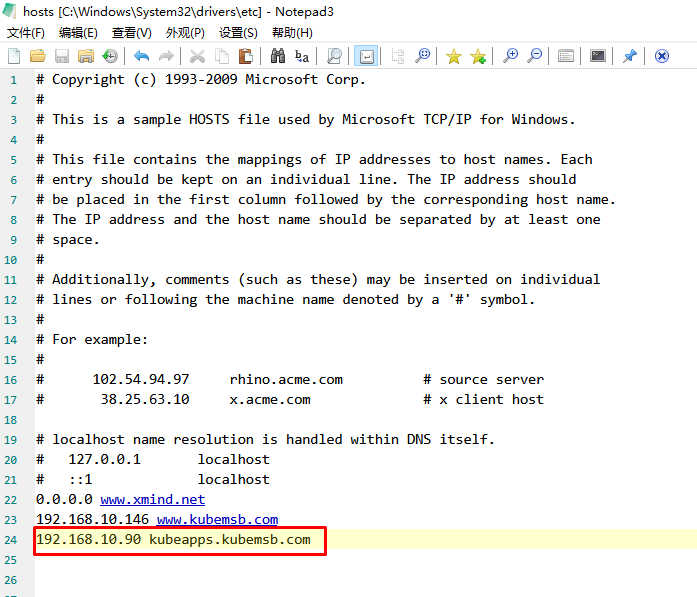
  - host: kubeapps.kubemsb.com                   # 自定义域名
    http:
      paths:
      - pathType: Prefix
        path: "/"
        backend:
          service:
            name: kubeapps     # 对应上面创建的service名称
            port:
              number: 80
[root@k8s-master01 ~]# kubectl apply -f kubeapps-ingress.yaml
ingress.networking.k8s.io/ingress-kubeapps created
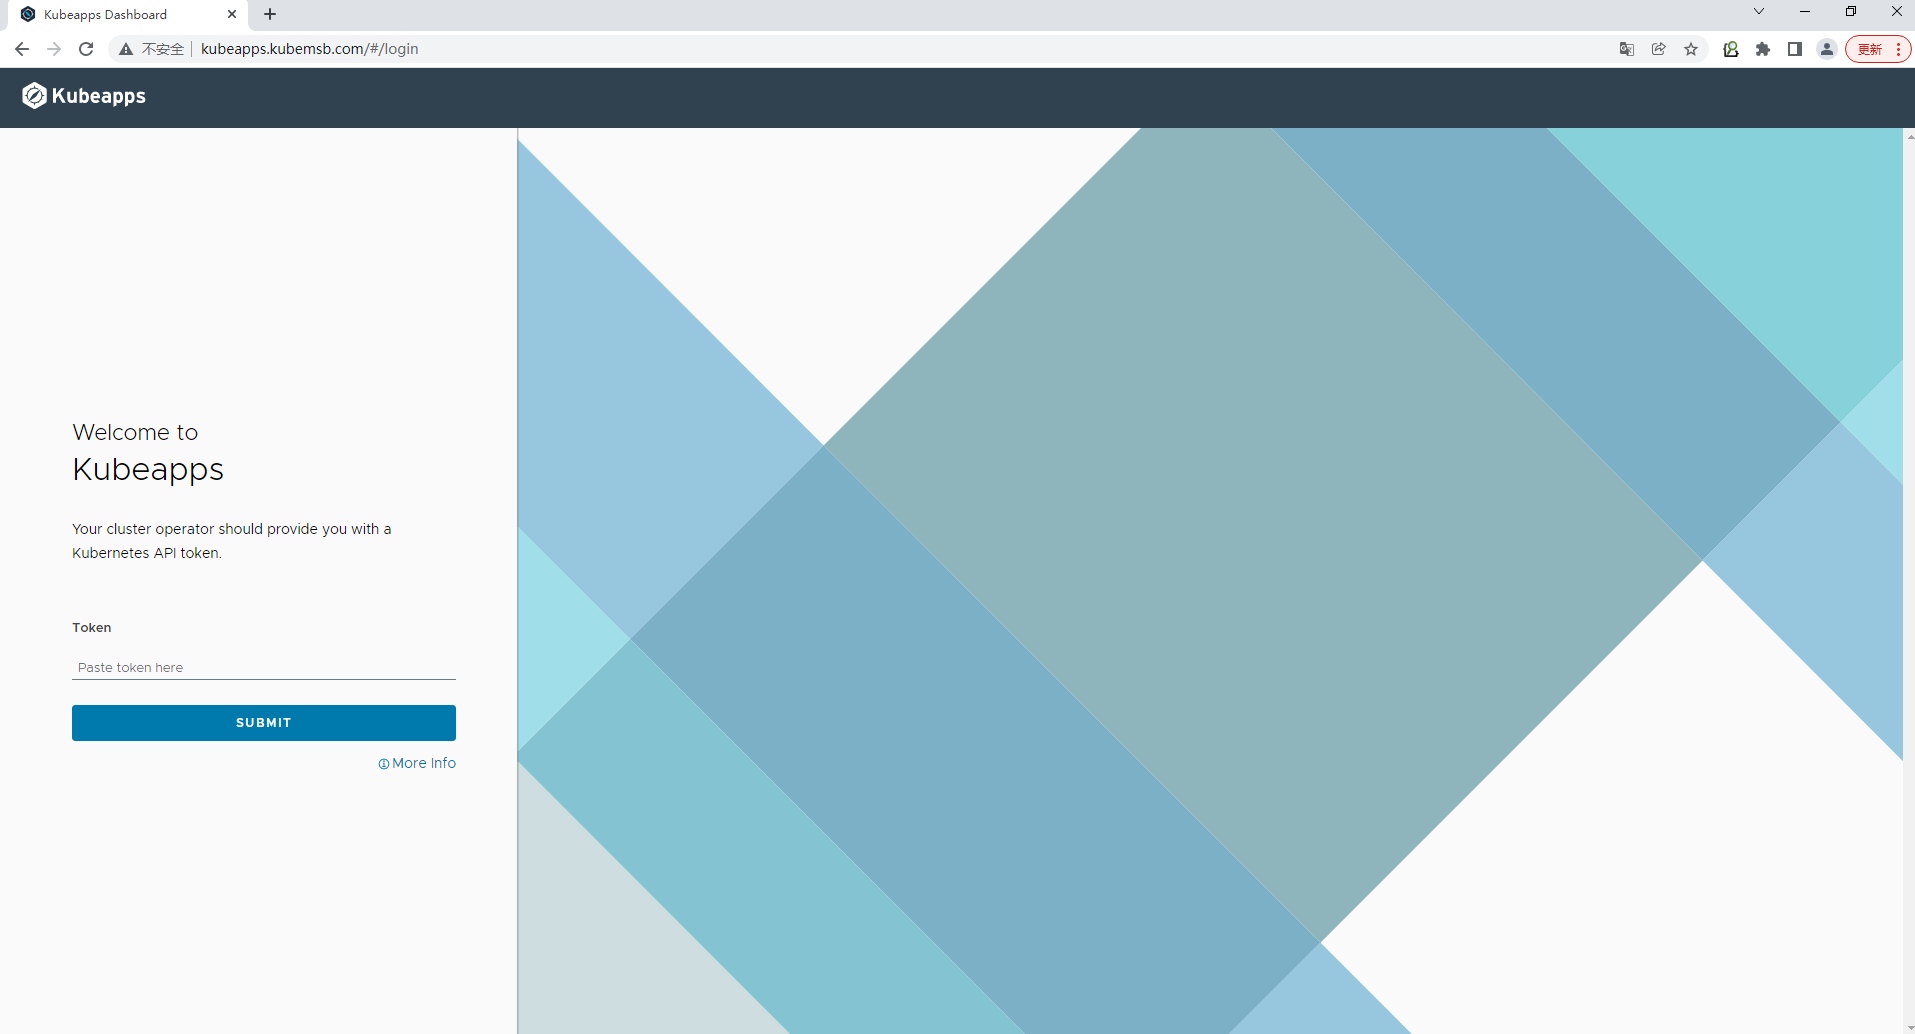
参考链接:https://kubeapps.dev/docs/latest/tutorials/getting-started/
创建用户
[root@k8s-master01 ~]# kubectl create --namespace default serviceaccount kubeapps-operator
serviceaccount/kubeapps-operator created
绑定集群管理员角色
[root@k8s-master01 ~]# kubectl create clusterrolebinding kubeapps-operator --clusterrole=cluster-admin --serviceaccount=default:kubeapps-operator
clusterrolebinding.rbac.authorization.k8s.io/kubeapps-operator created
[root@k8s-master01 ~]# cat <<EOF | kubectl apply -f -
apiVersion: v1
kind: Secret
metadata:
  name: kubeapps-operator-token
  namespace: default
  annotations:
    kubernetes.io/service-account.name: kubeapps-operator
  type: kubernetes.io/service-account-token
EOF


输出:
secret/kubeapps-operator-token created
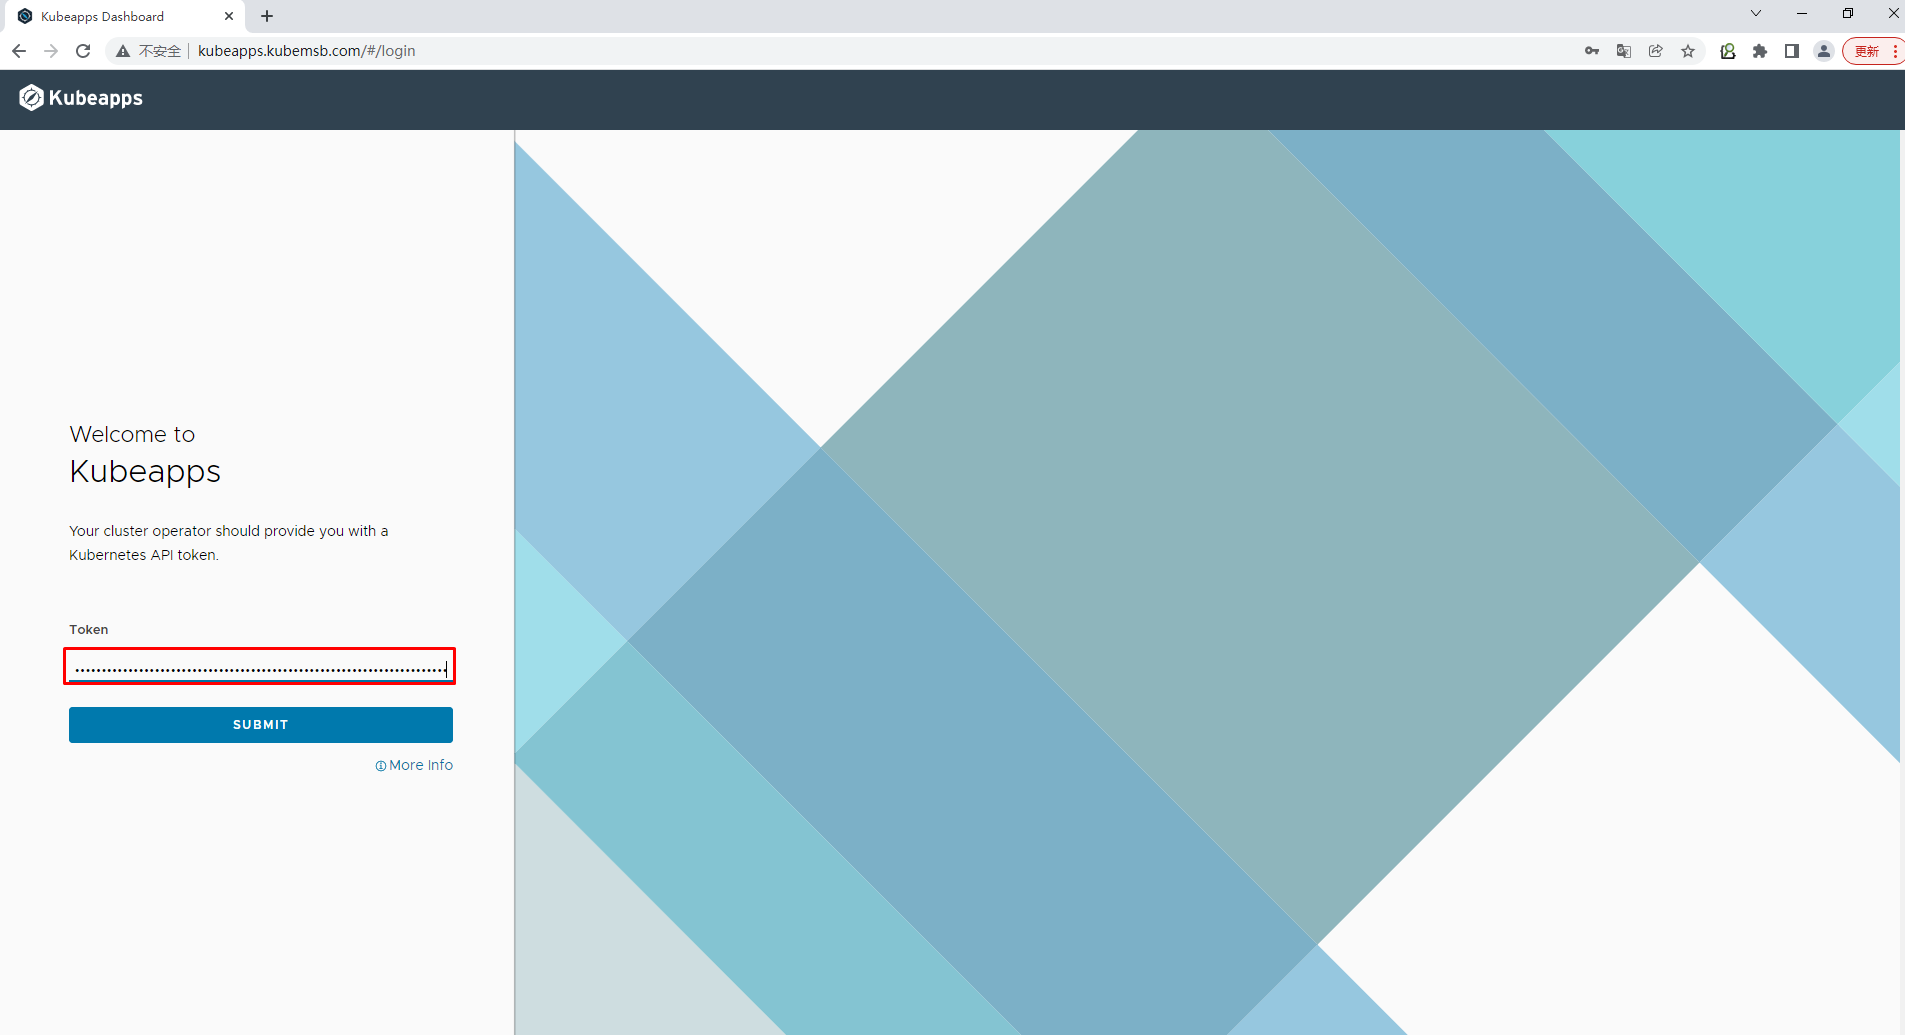
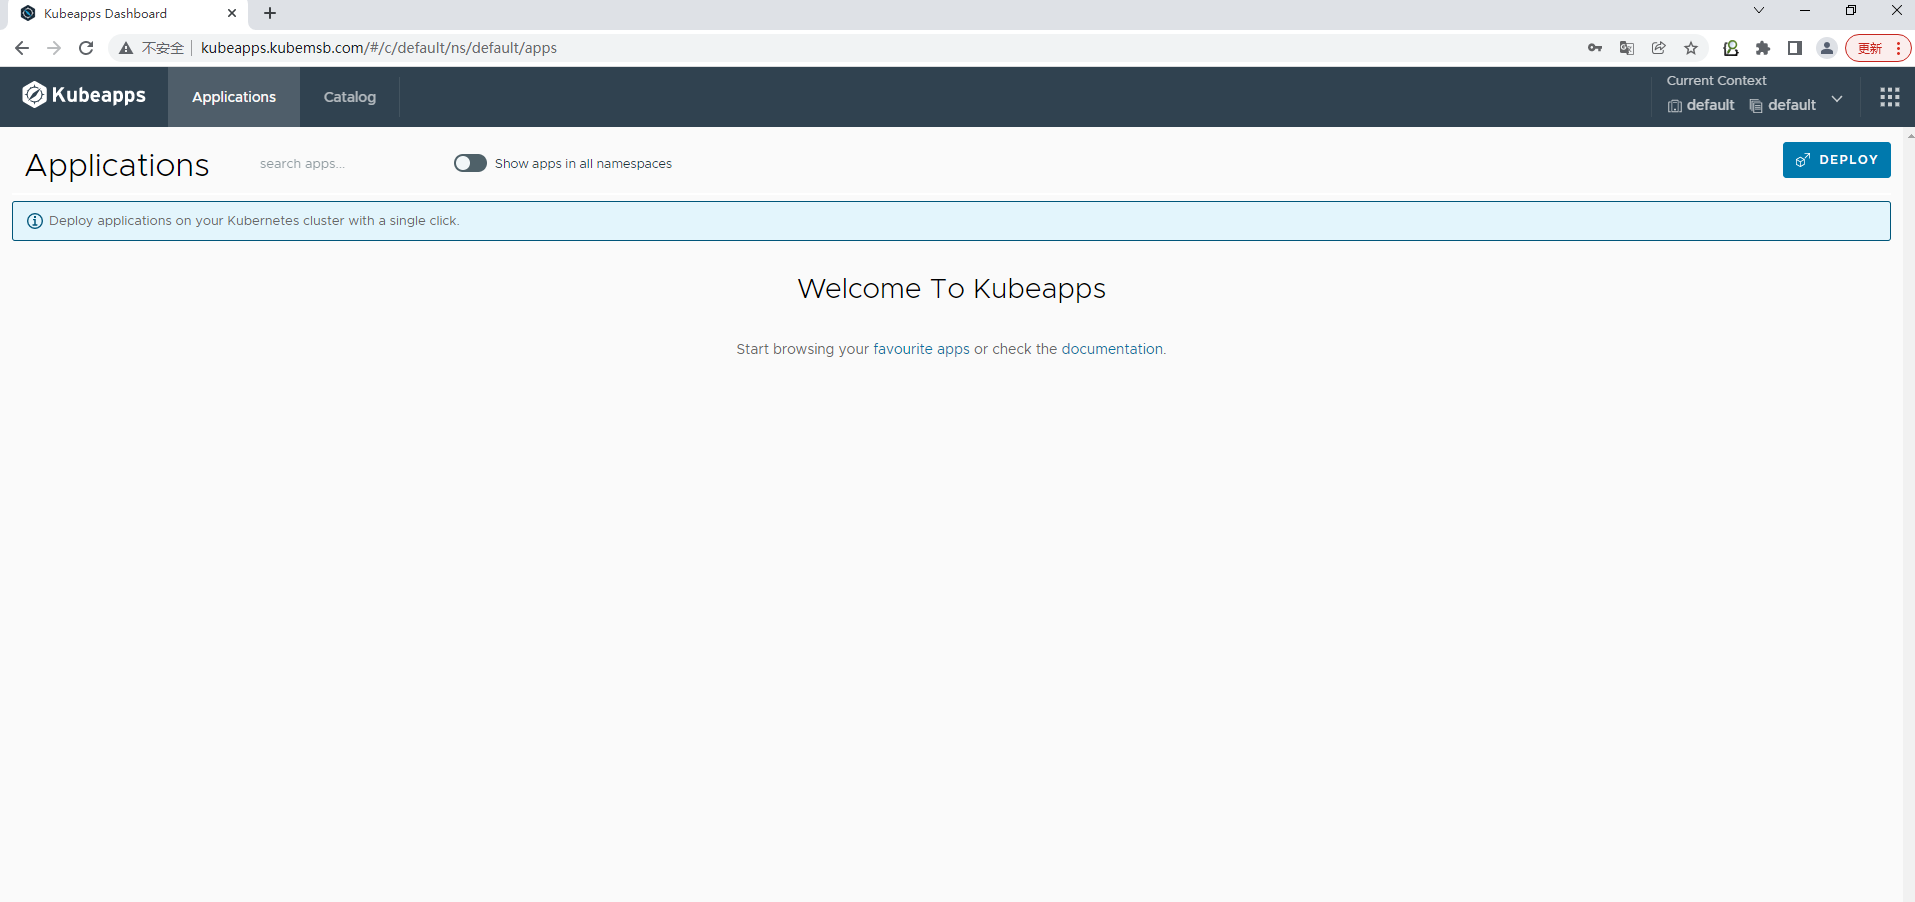
获取访问token
[root@k8s-master01 ~]# kubectl get --namespace default secret kubeapps-operator-token -o jsonpath='{.data.token}' -o go-template='{{.data.token | base64decode}}' && echo
eyJhbGciOiJSUzI1NiIsImtpZCI6ImRneWtqS2s2OWFsZU94UklERWh5SlhMSk56SUZZQzZOYlhHbUZIaDZpcTQifQ.eyJpc3MiOiJrdWJlcm5ldGVzL3NlcnZpY2VhY2NvdW50Iiwia3ViZXJuZXRlcy5pby9zZXJ2aWNlYWNjb3VudC9uYW1lc3BhY2UiOiJkZWZhdWx0Iiwia3ViZXJuZXRlcy5pby9zZXJ2aWNlYWNjb3VudC9zZWNyZXQubmFtZSI6Imt1YmVhcHBzLW9wZXJhdG9yLXRva2VuIiwia3ViZXJuZXRlcy5pby9zZXJ2aWNlYWNjb3VudC9zZXJ2aWNlLWFjY291bnQubmFtZSI6Imt1YmVhcHBzLW9wZXJhdG9yIiwia3ViZXJuZXRlcy5pby9zZXJ2aWNlYWNjb3VudC9zZXJ2aWNlLWFjY291bnQudWlkIjoiYjgzMjM3MDAtODI3MC00ODI5LWFmNmUtODg3N2FlNGM4OWQ3Iiwic3ViIjoic3lzdGVtOnNlcnZpY2VhY2NvdW50OmRlZmF1bHQ6a3ViZWFwcHMtb3BlcmF0b3IifQ.NF4A7N394MwcRDQbHOTkahg_ODqi7OCV9CzP7zcb5kXwHo-DeQ20cf7CTYmyQCw1aKaYae-Vdi_ncJ9araSdapshoBX9zfQ4dl6rP6Z_g_rtHZBIe4rCopOPUqncY-OjonQL1R0MY8ODqE2BVPF3kHwcBnamT9c1nmib42fB_cIBqwu72c71LURvQifwiluriQZRJQWh20pM7p8aUkNXqvFId03iMdgmPXdOd5W2Kl1Rys2DUfPmRV1tmqXHuZOcMnHmSU7DzcaXcnoGesZUnB7sqtL2HhTn7iLnk323MaXzhNY5pWt2nZC-6U2ZFkPSkV2LZ1K6D2IxaImkZxRPVQ

8.4 通过kubeapps部署应用案例
8.4.1 通过kubeapps部署nginx
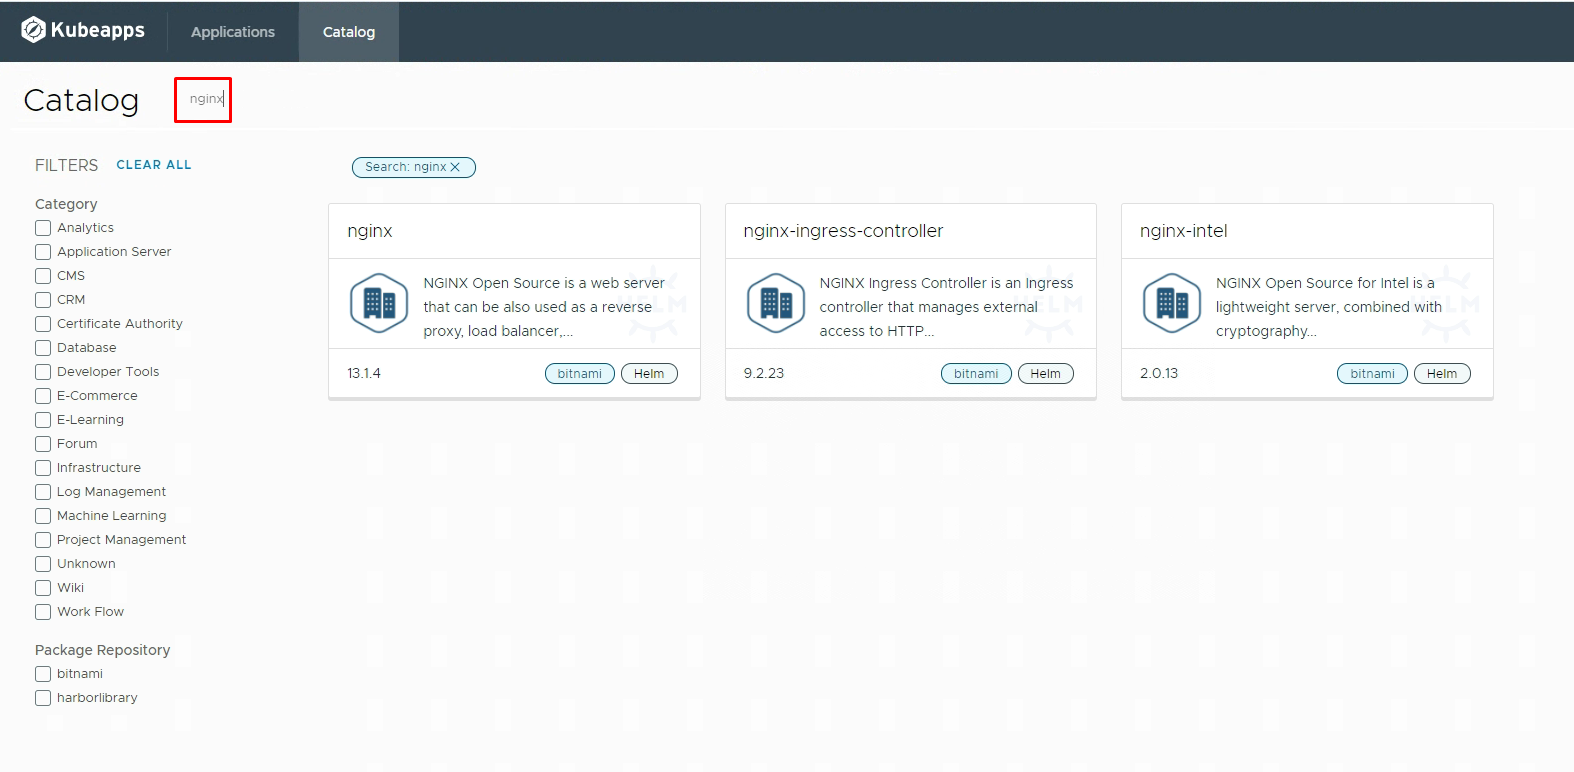
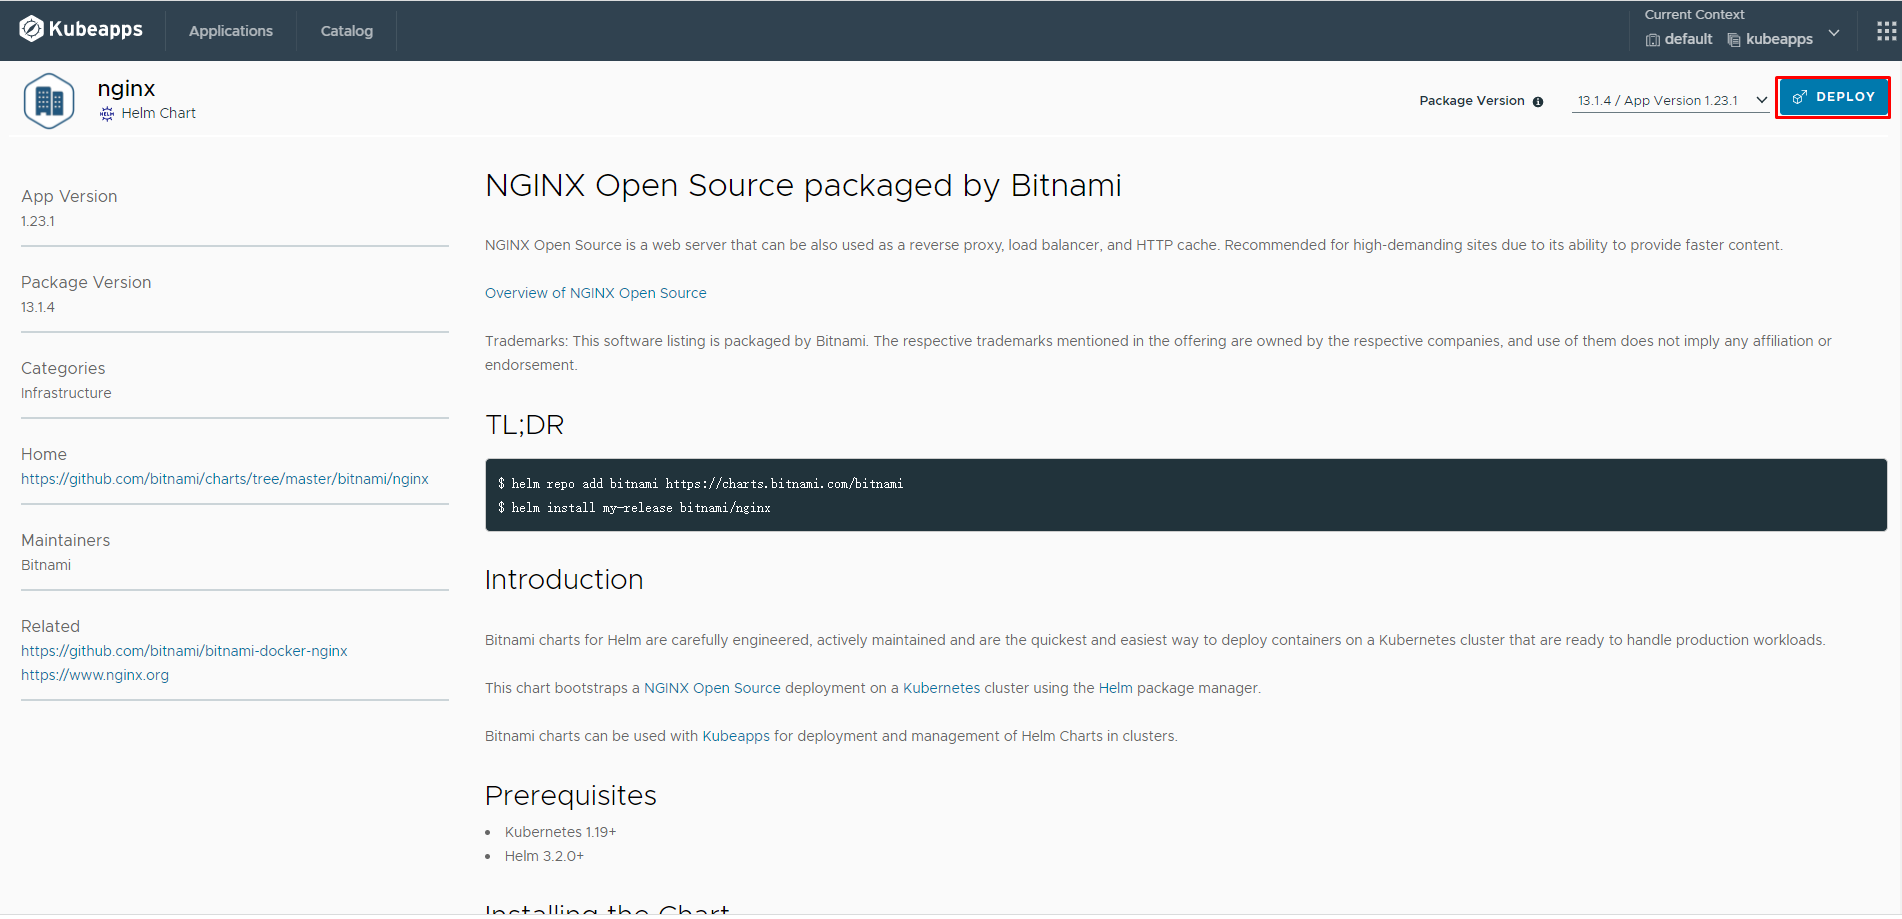
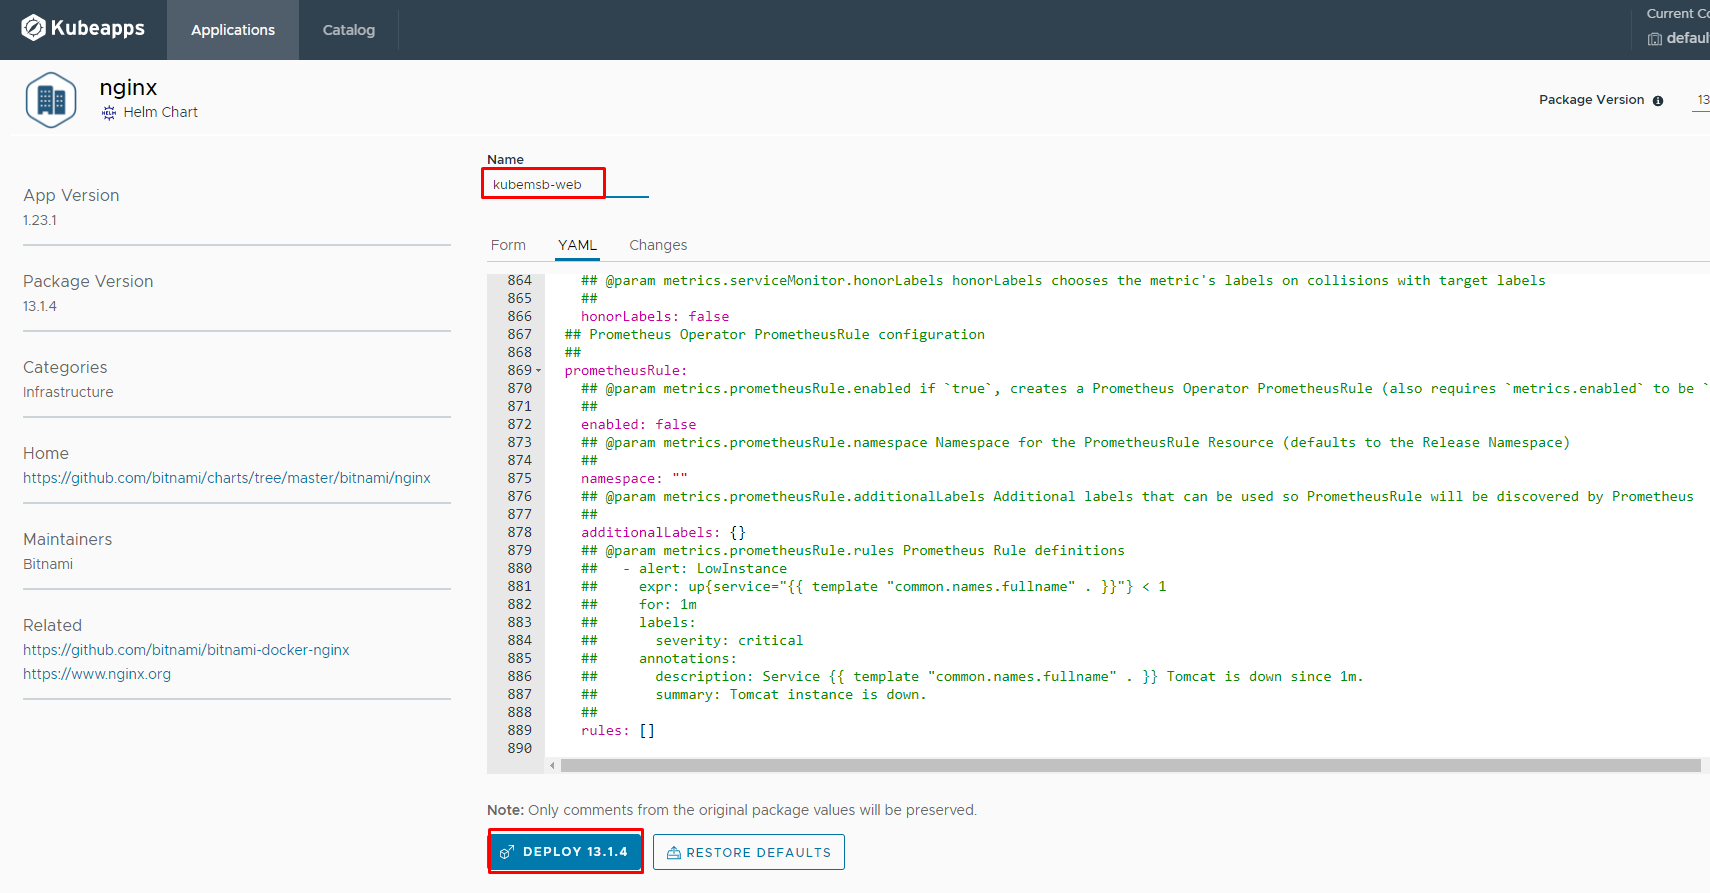
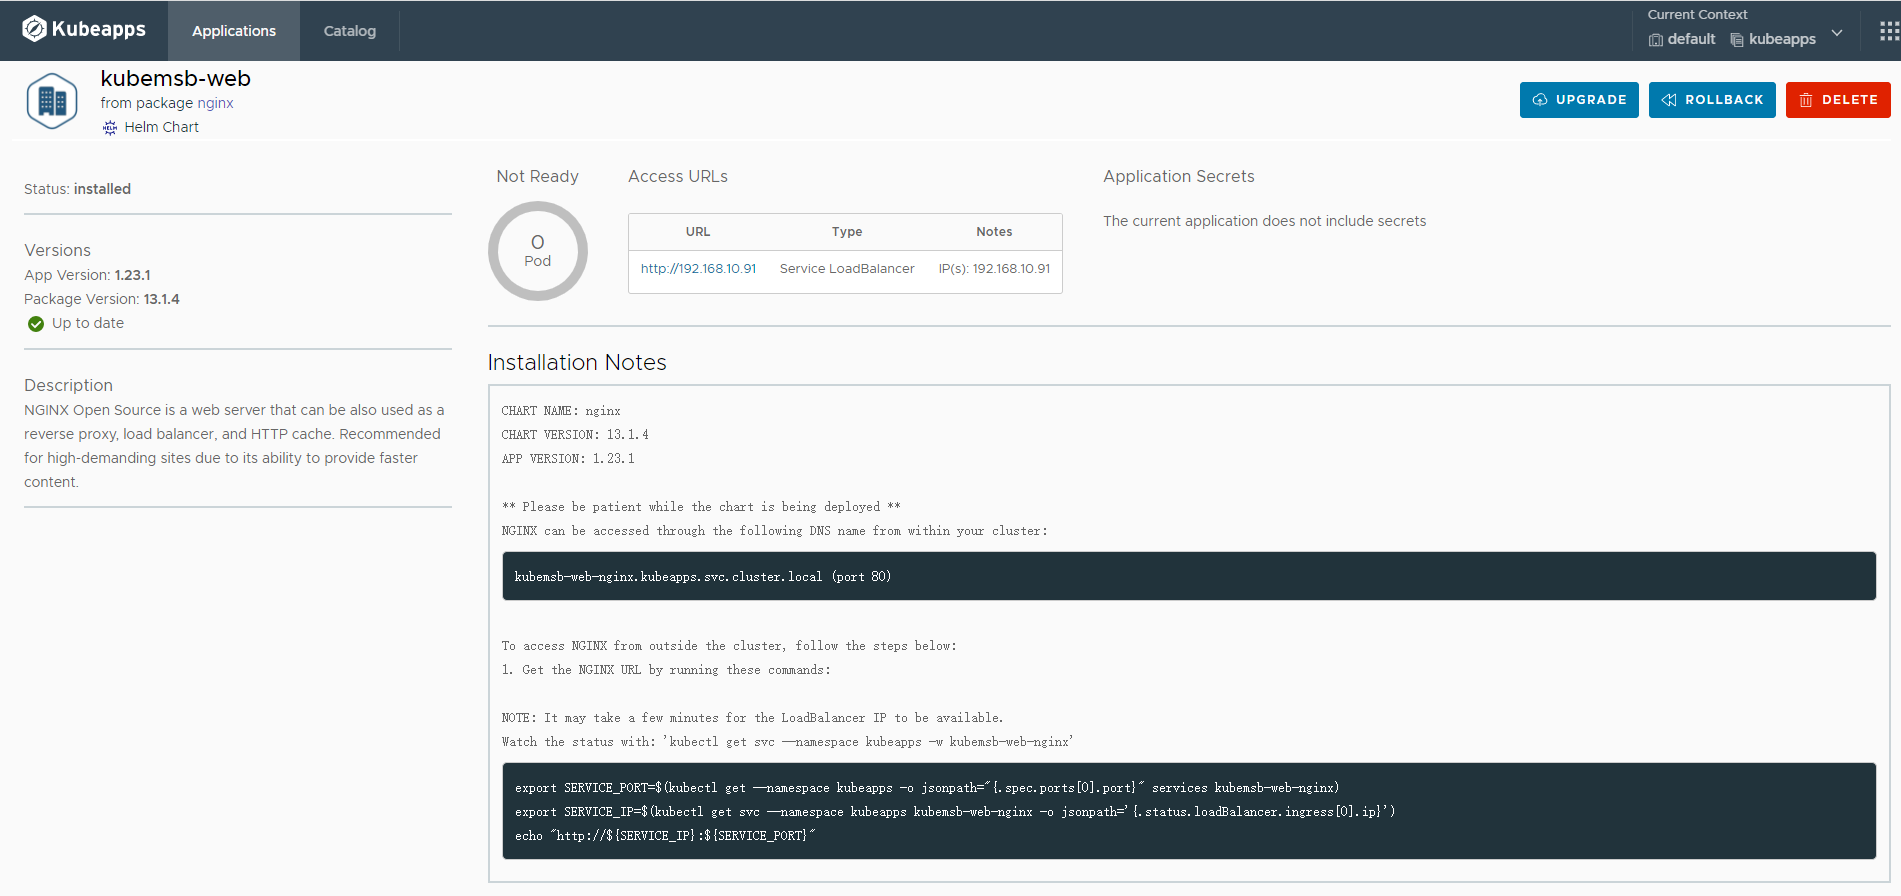
[root@k8s-master01 nginx]# kubectl get pods -n kubeapps
NAME                                                         READY   STATUS                       RESTARTS      AGE
......
kubemsb-web-nginx-55fdb5bfd6-4cfpg                           1/1     Running                      0             57s
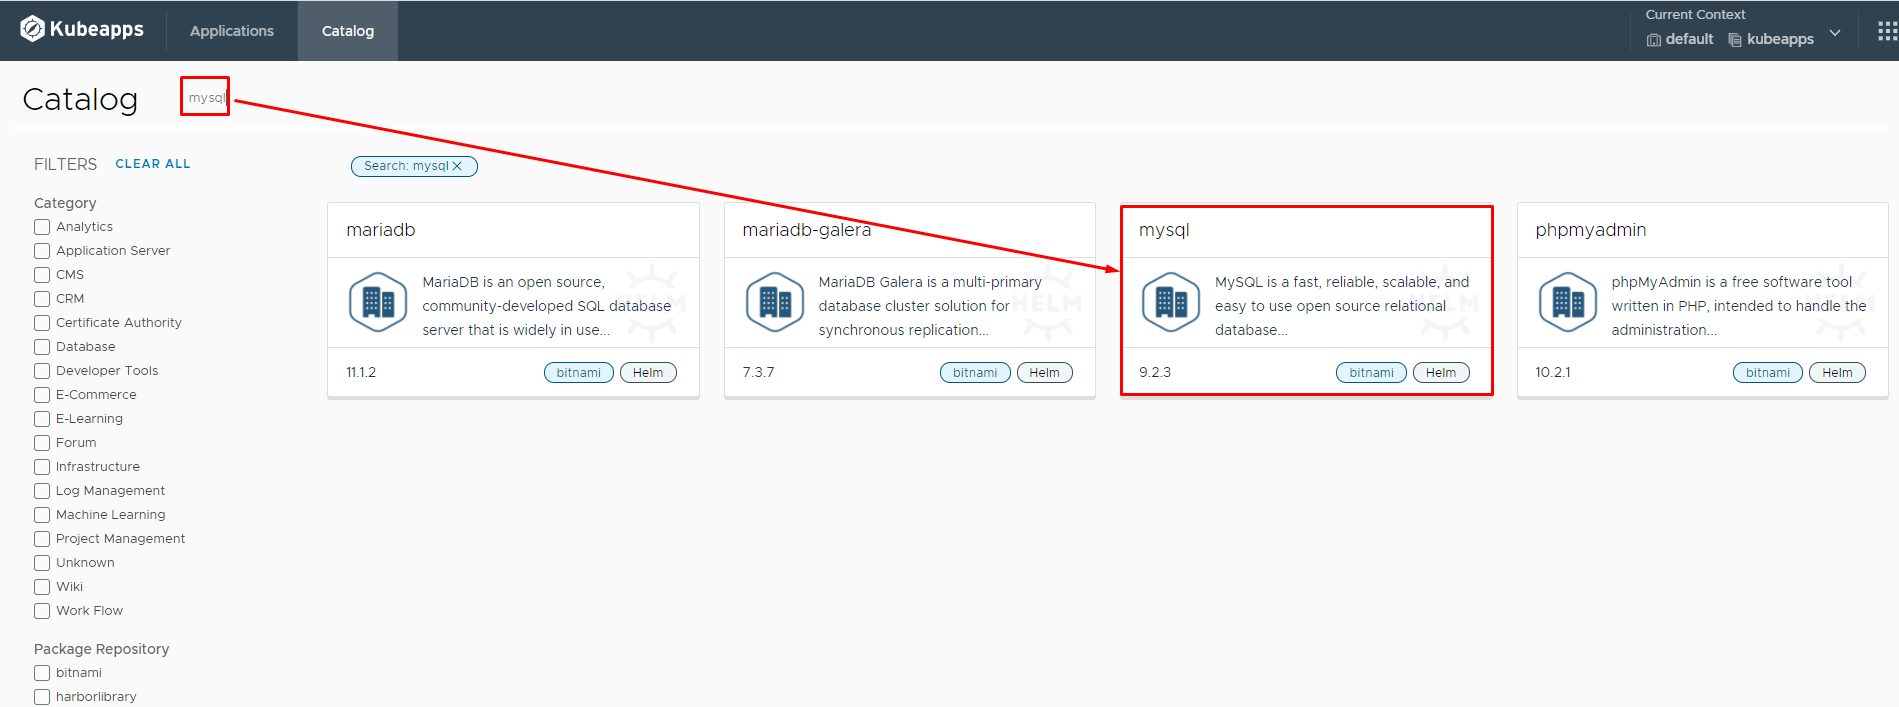
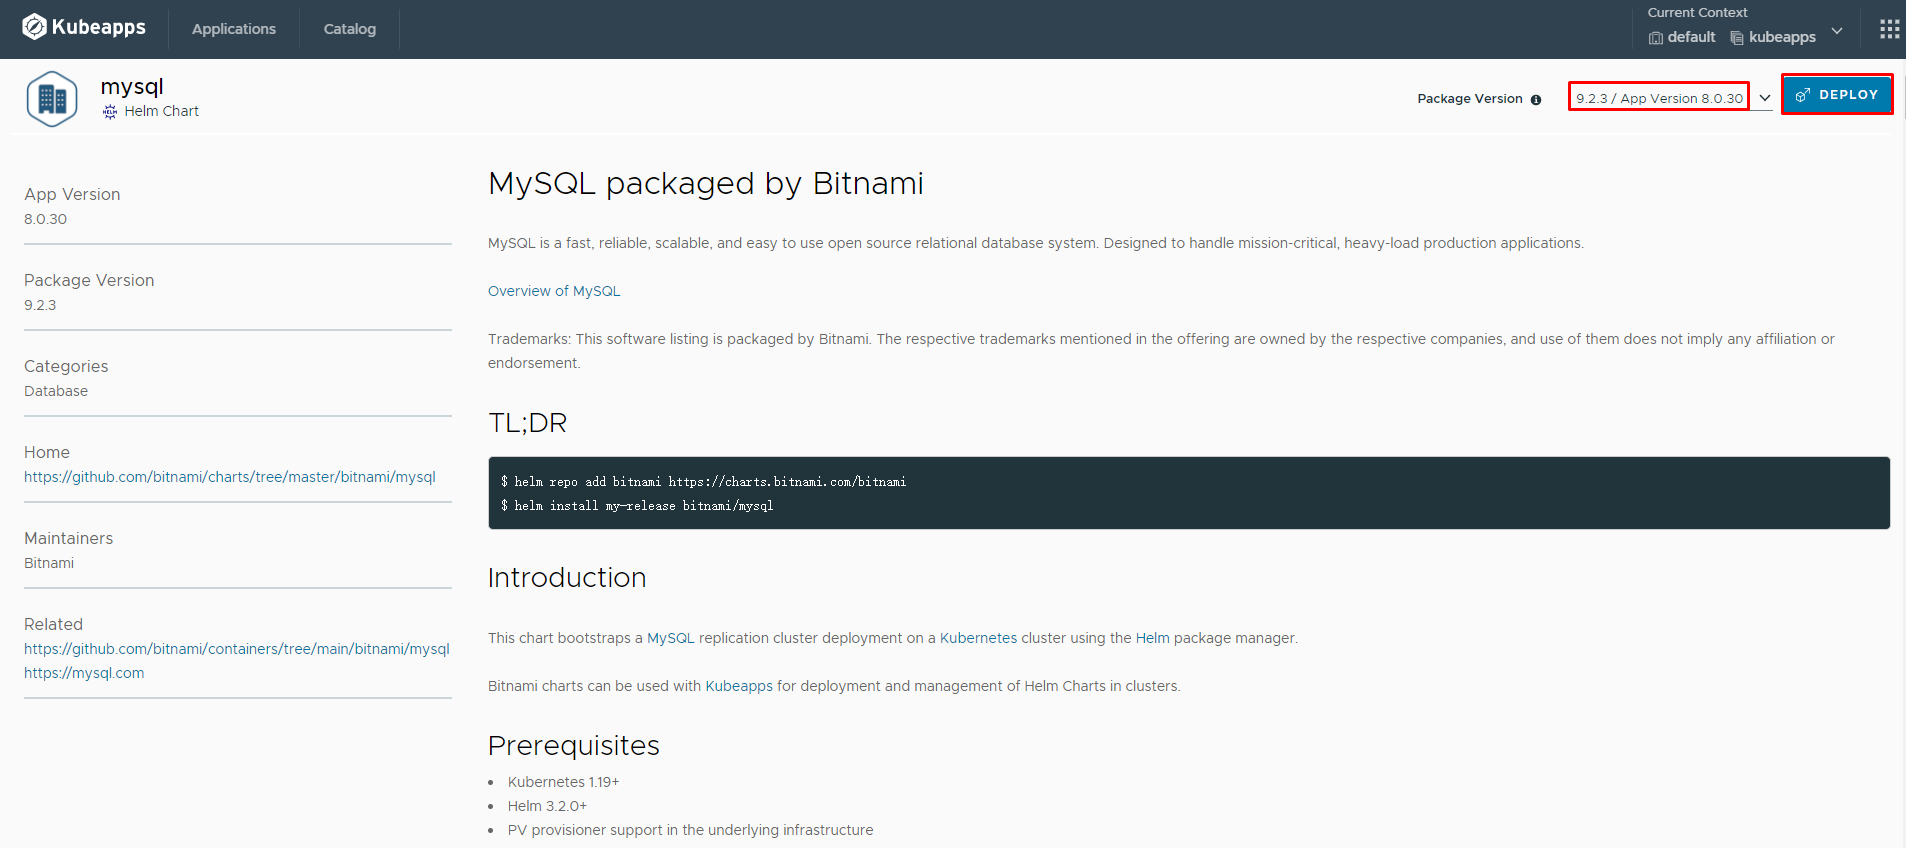
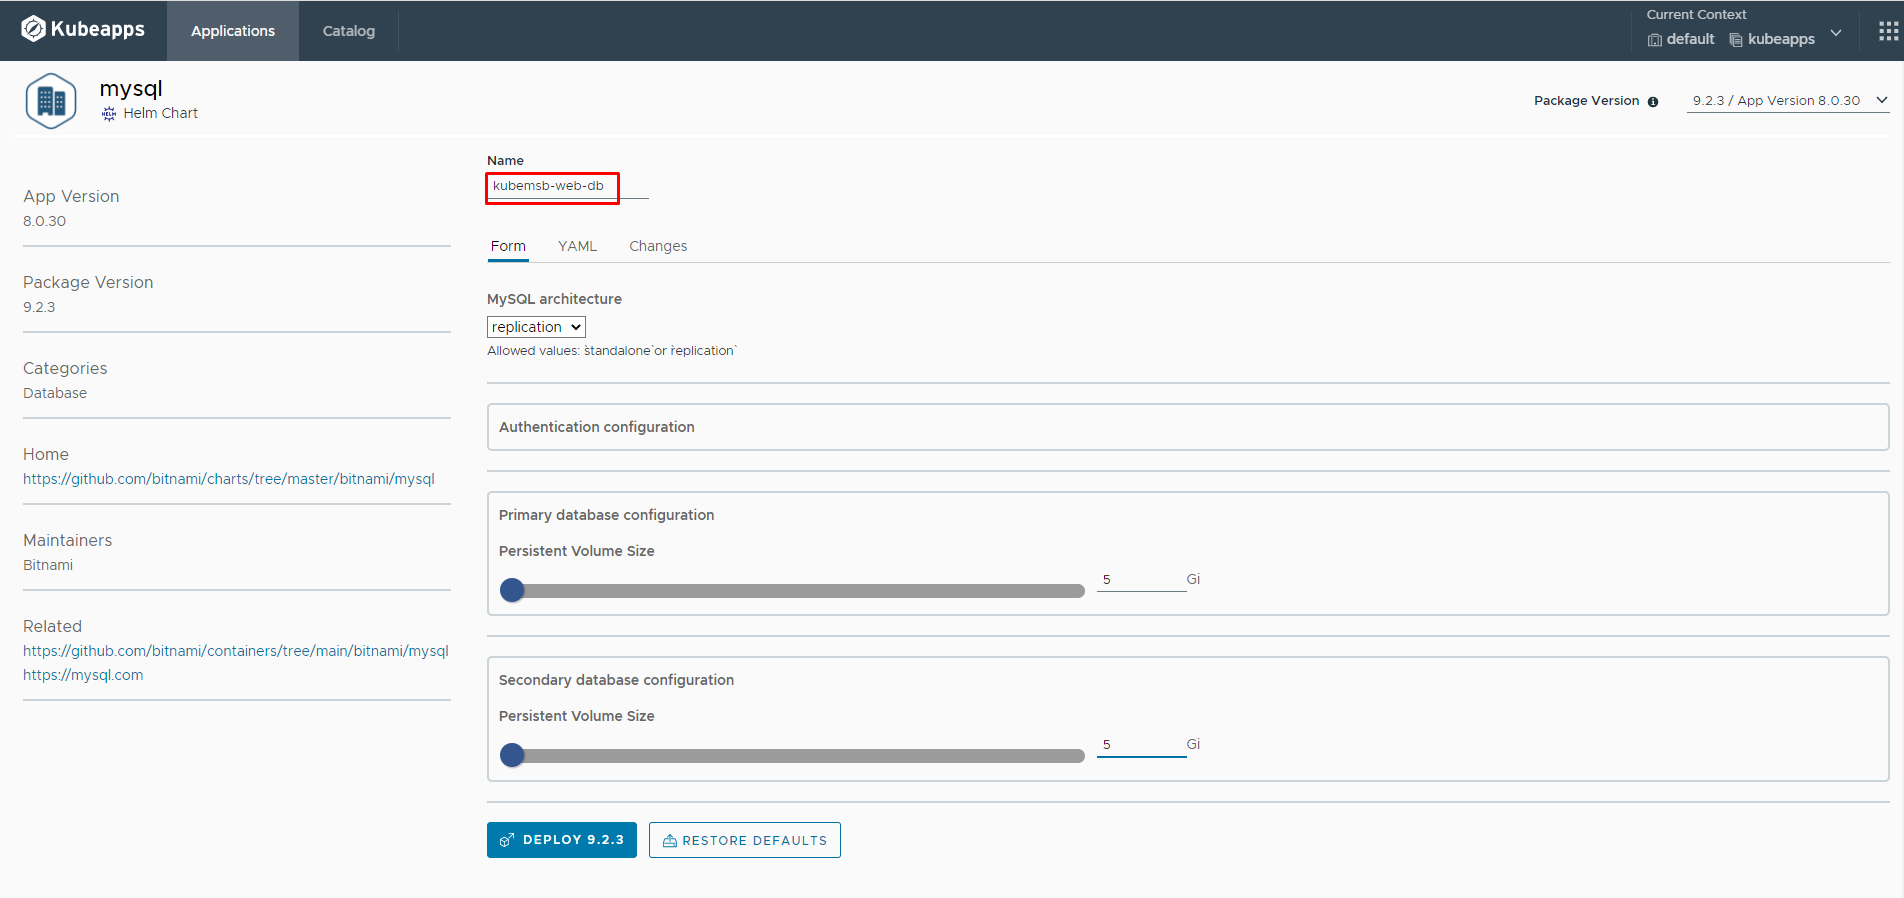
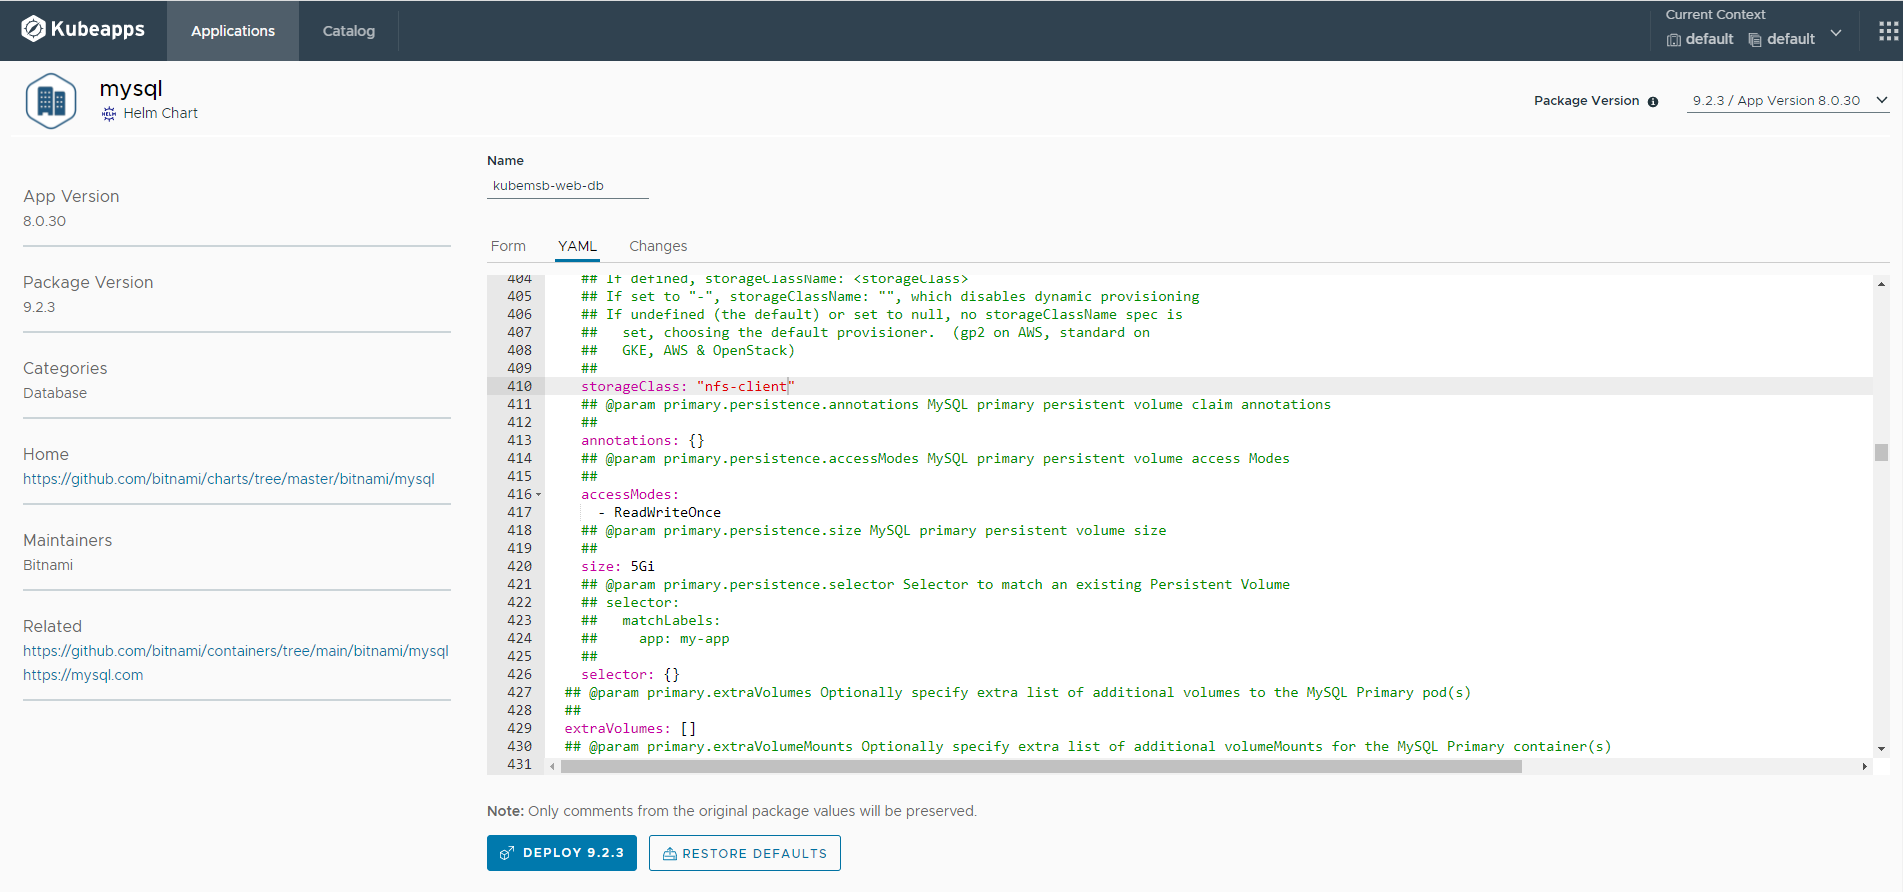
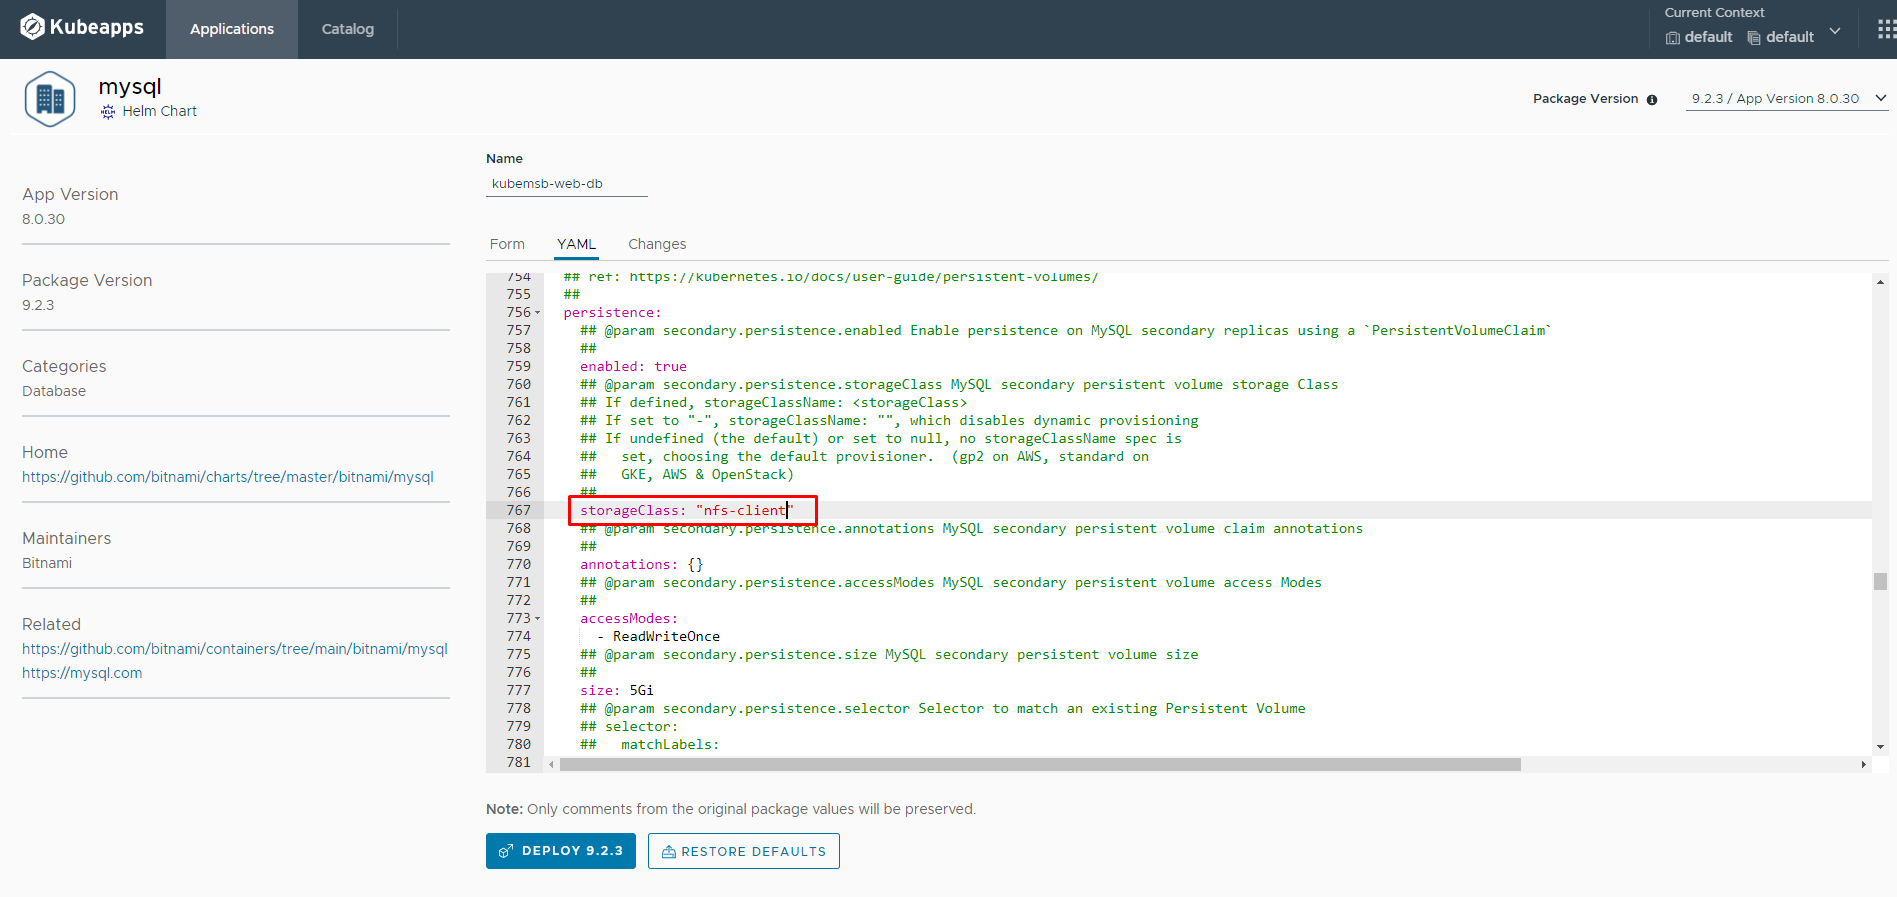
8.4.2 通过kubeapps部署mysql
snv
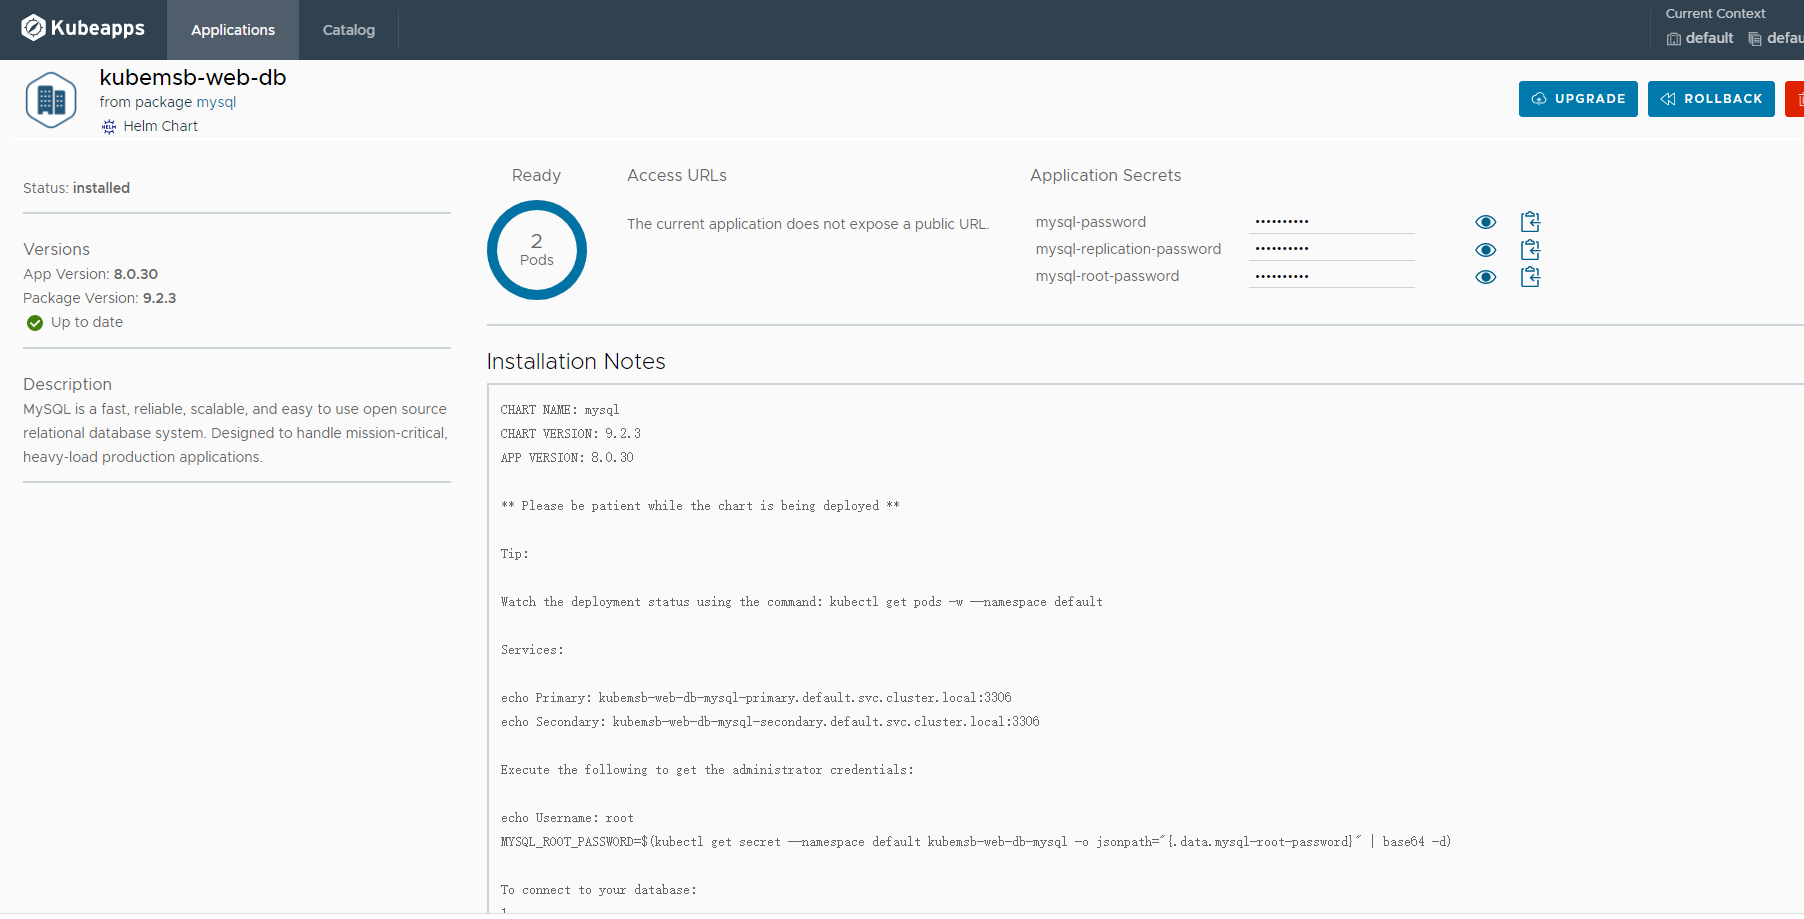
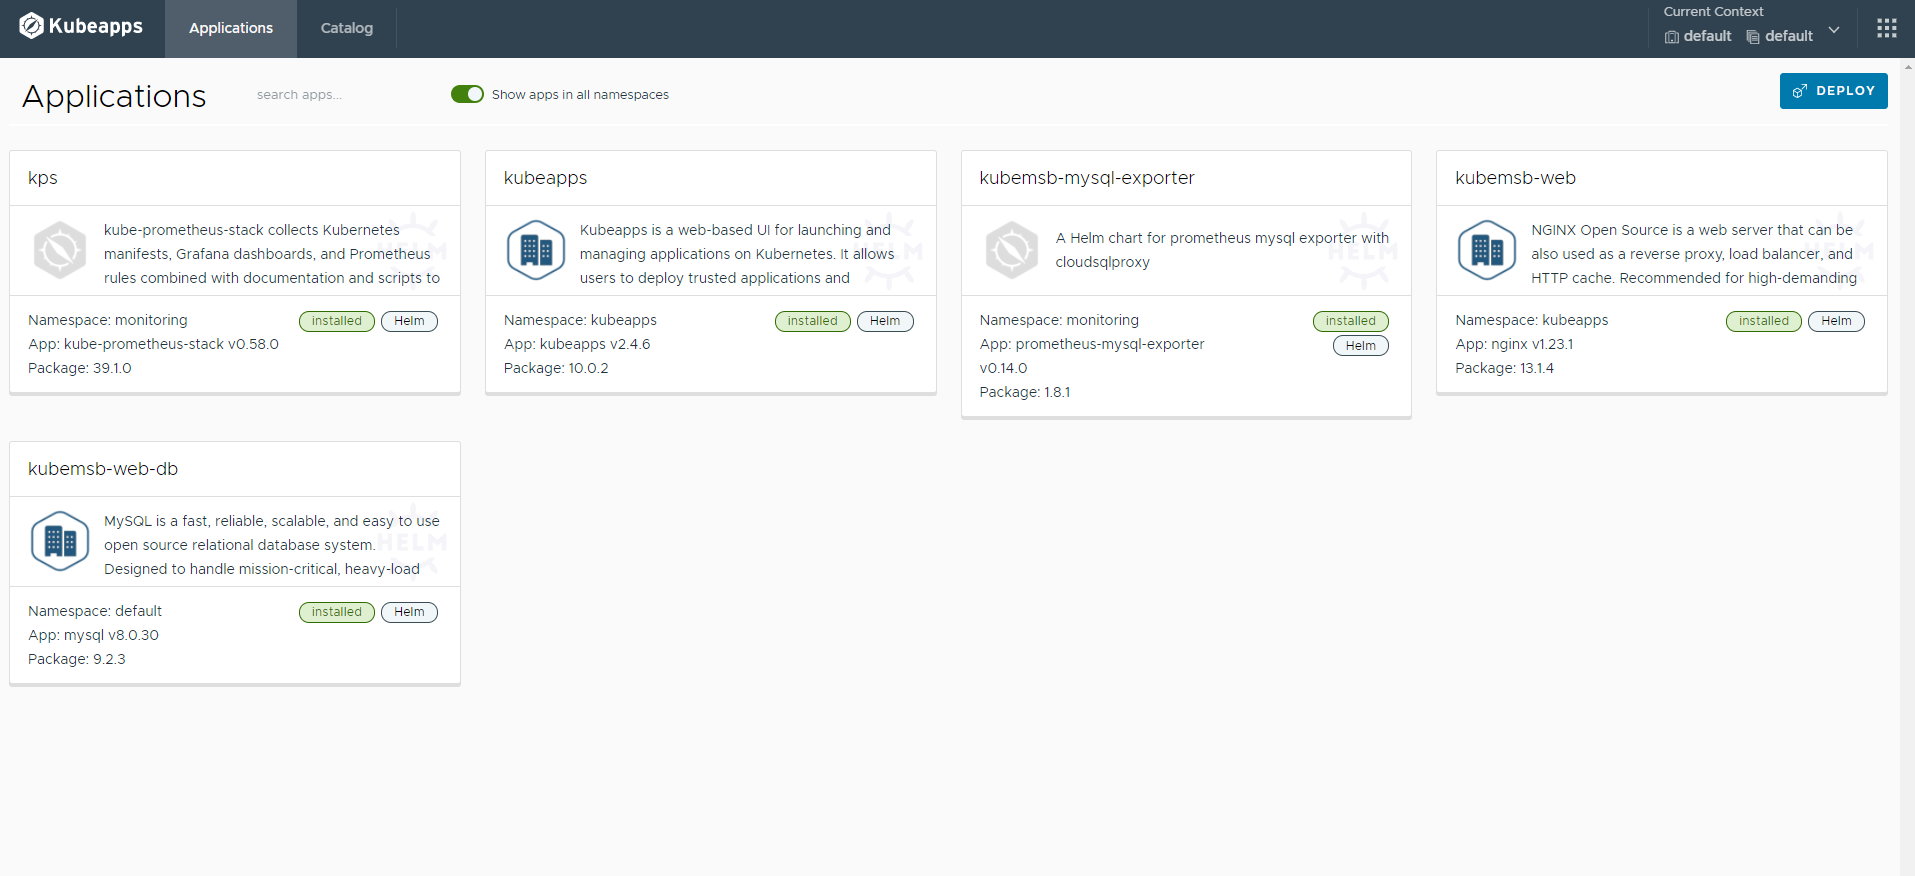
[root@k8s-master01 ~]# kubectl get pods
NAME                                     READY   STATUS    RESTARTS      AGE
kubemsb-web-db-mysql-primary-0           1/1     Running   0             5h29m
kubemsb-web-db-mysql-secondary-0         1/1     Running   0             5h29m